
My Favorite Project
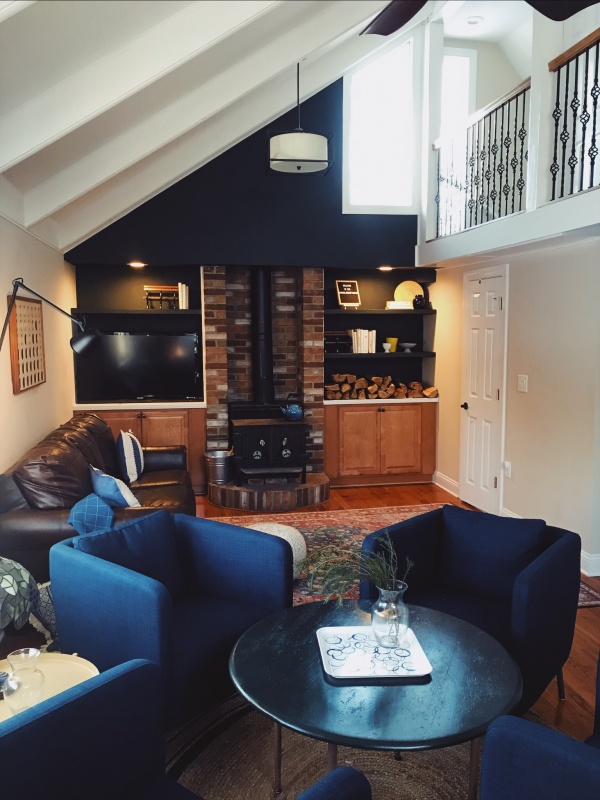
My favorite project we’ve completed at the Woodland Cottage in Pennsylvania so far are the floating shelves and dark green wall surrounding our wood burning stove! My dad and I worked together to create a custom design, cut the wood, and install floating shelves in the two alcoves. It has made such a difference in the overall visual design of the room!
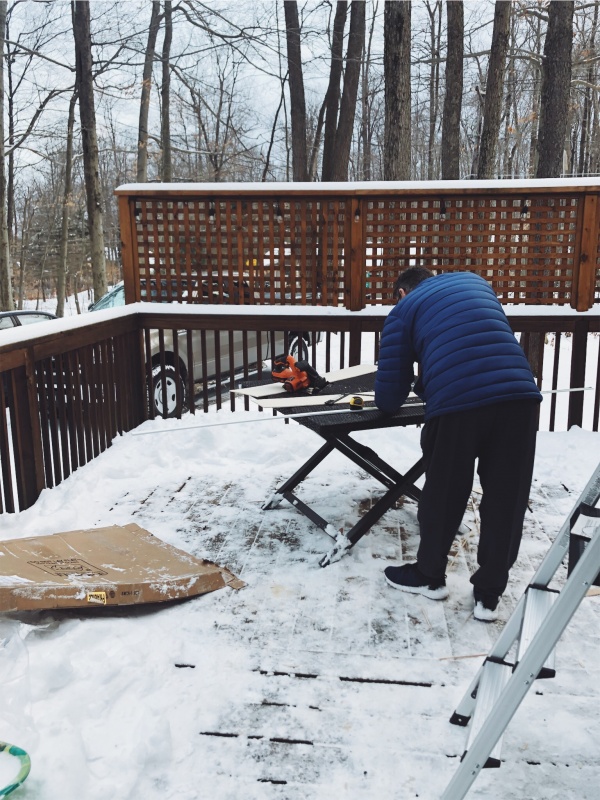
We started building the shelves one evening as soon as the girls went to bed. We worked late into the night while the house was quiet, and added the finishing touches the next day.
Envisioning The Project
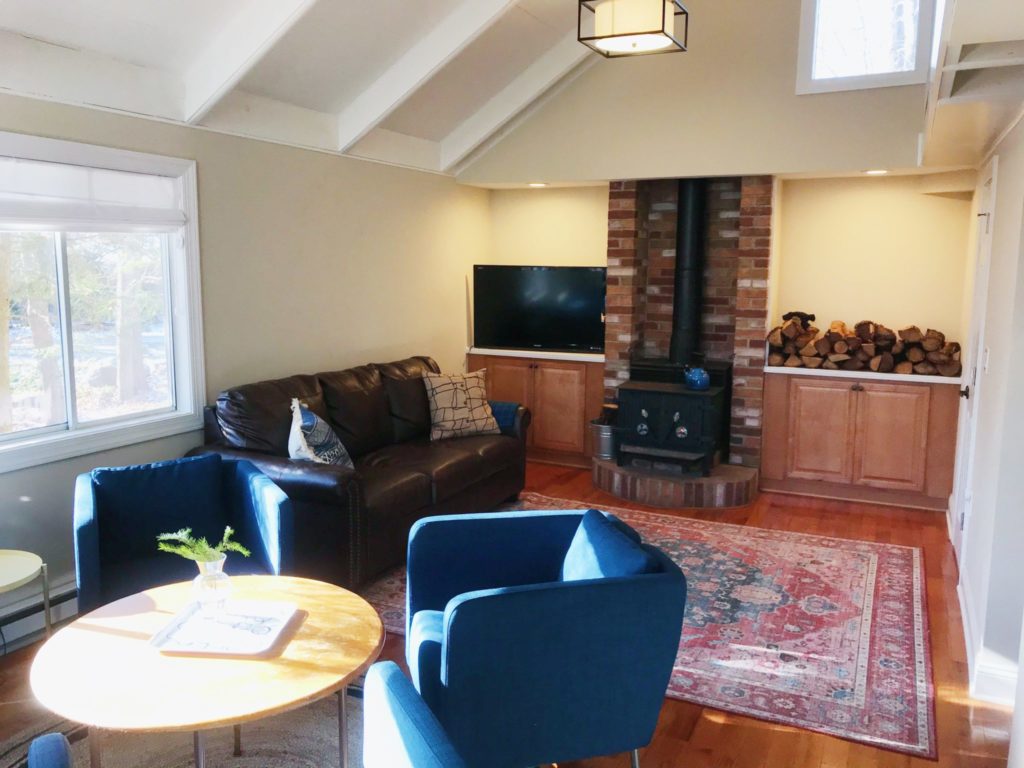
When Emily and I purchased this home, we spent time designing the layout for the living area and choosing the furnishings. The previous owner had added low built-in cabinets on both sides of the stove. We thought that the alcove spaces looked unfinished. We wanted to add visual warmth and depth to the space.
Adding Paint
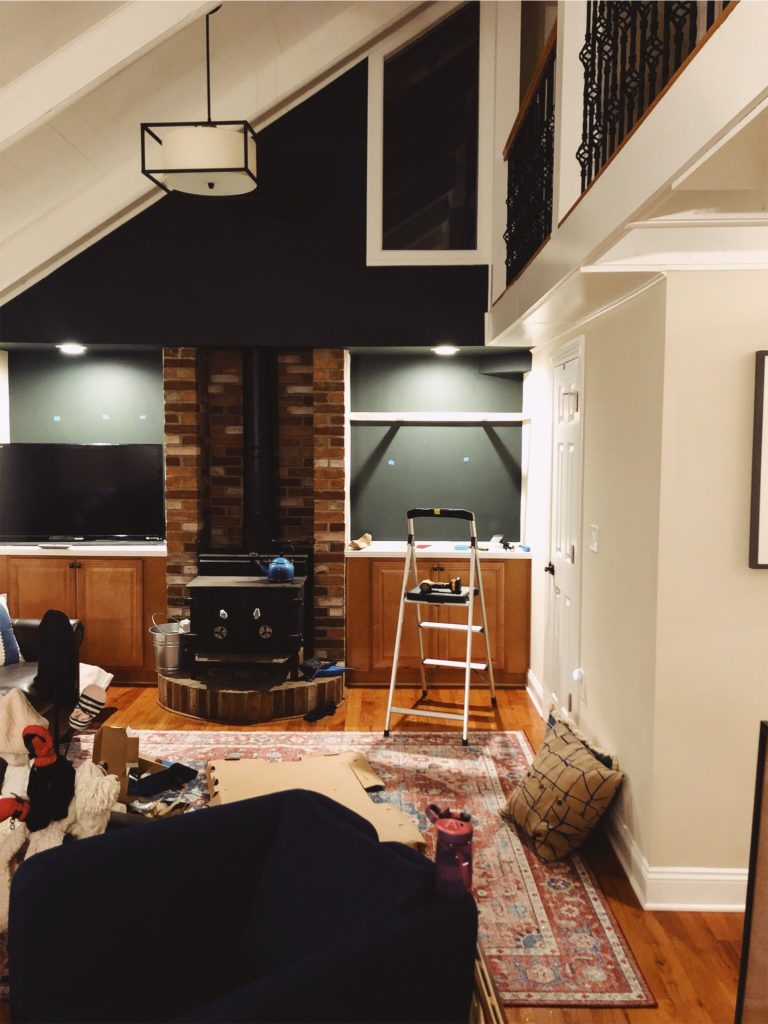
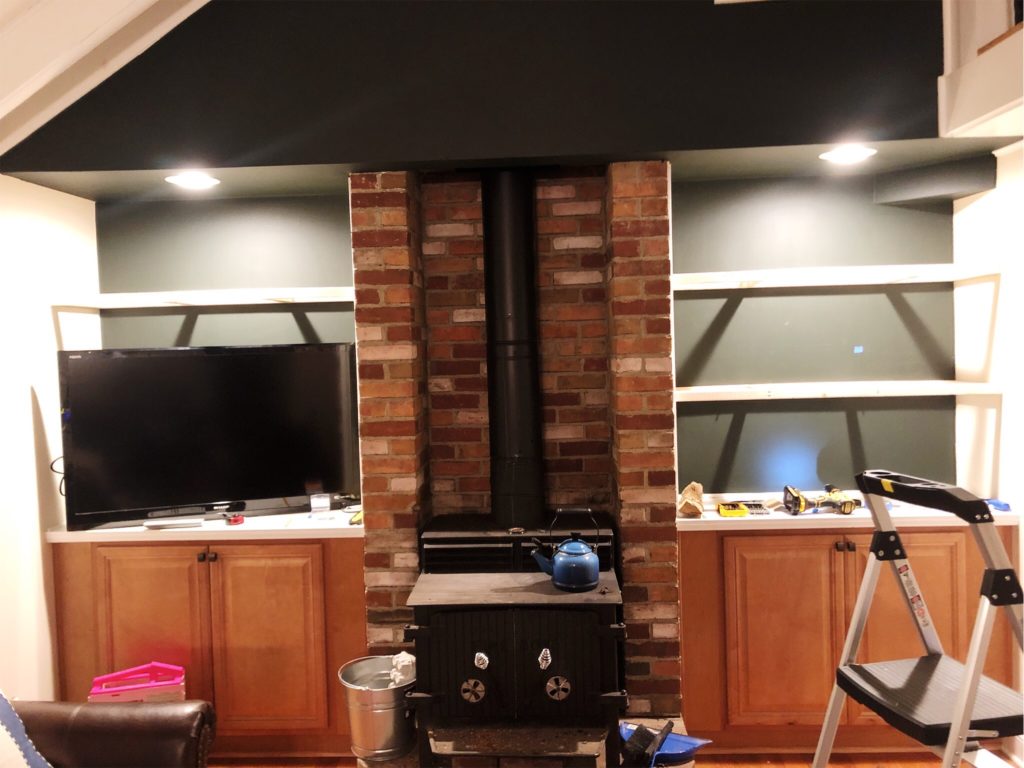
I started by painting the alcoves and the angled wall above the alcoves a deep Jasper green. We love how the dark color added a richness to the space and how it accentuated the leather sofa and navy chairs.
Emily and I also researched several pre-made floating shelving options for the space. The alcoves look symmetrical, but they do not actually have identical dimensions. That made it difficult to find pre-made options that would perfectly fill the space. I decided to create custom DIY floating shelves with my dad.
Designing and Building Floating Shelves
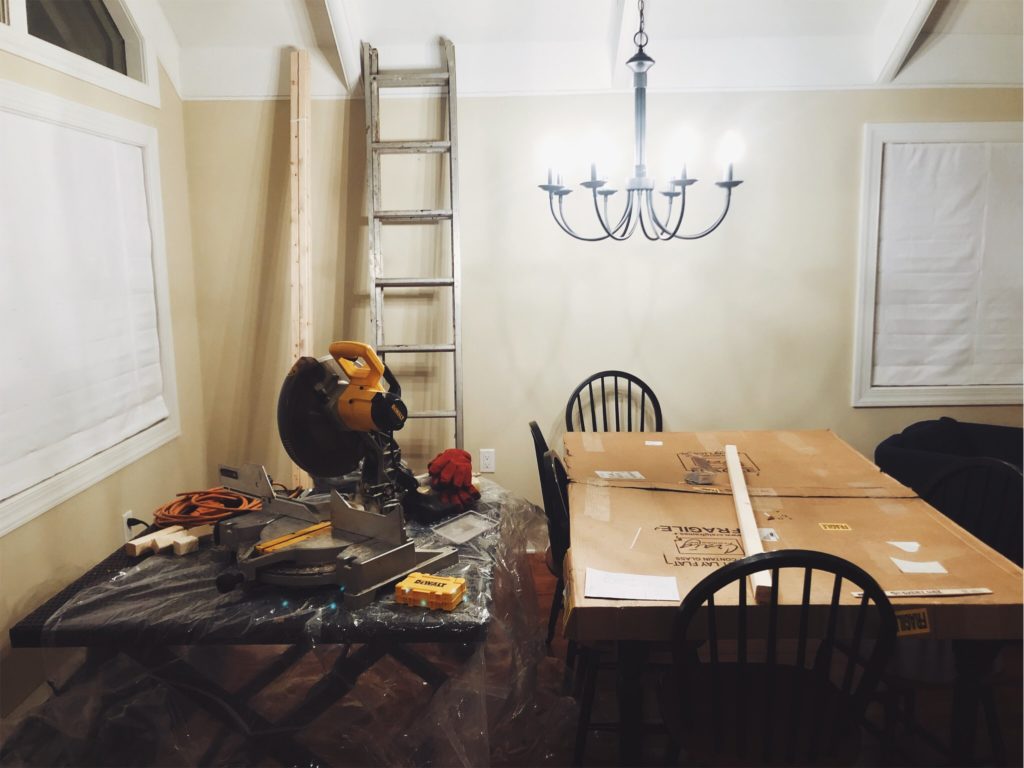
My dad and I researched several DIY floating shelves options and drew up a few mock-up plans. We finally decided to build the floating shelves out of 2 x 2 x 8 boards to create the frame. We added particle board strips to the top and bottom of the shelves.
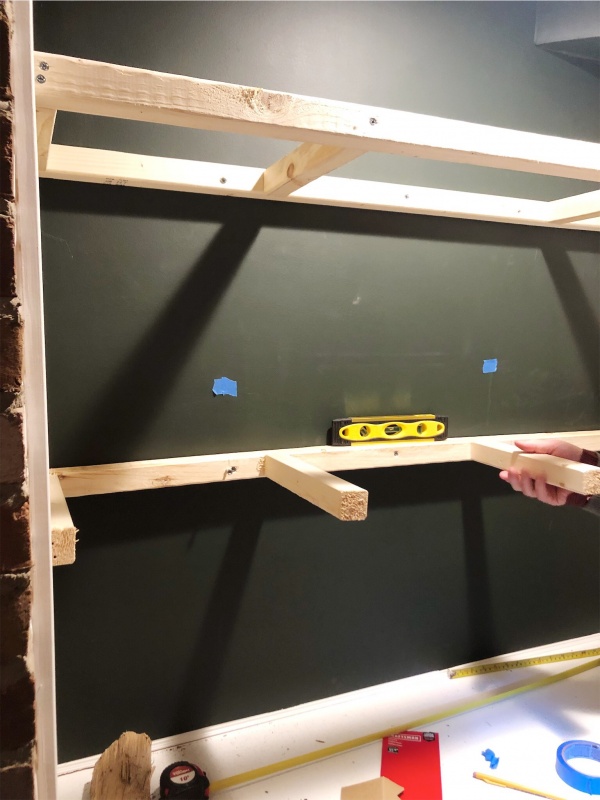
The frame was designed to be drilled into the wall studs. The first step was to cut two large strips of the 2 x 2 x 8 boards to be the front and back of the frame. Then we cut 4 smaller strips to connect the front and back strips. We then drilled the pieces together to complete the frame for the first of the floating shelves, and screwed the frame into the wall. My DEWALT cordless drill made the assembly process so easy!
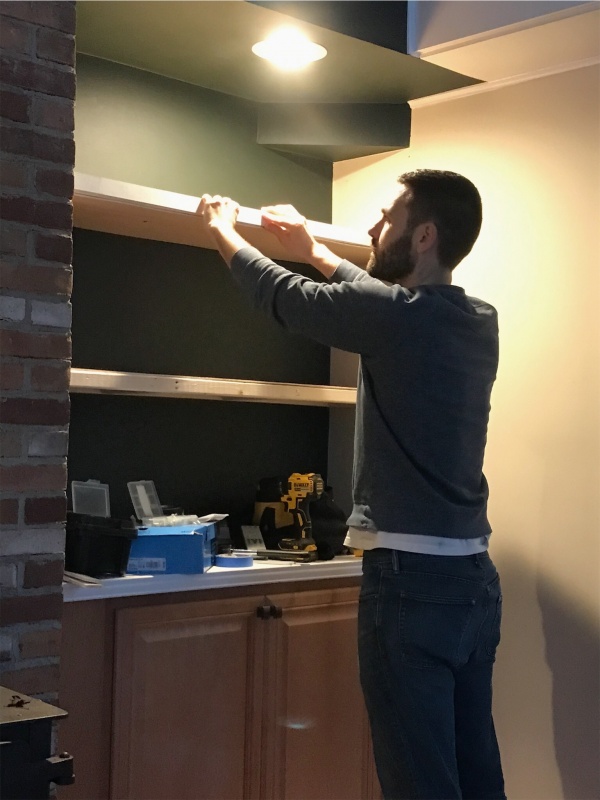
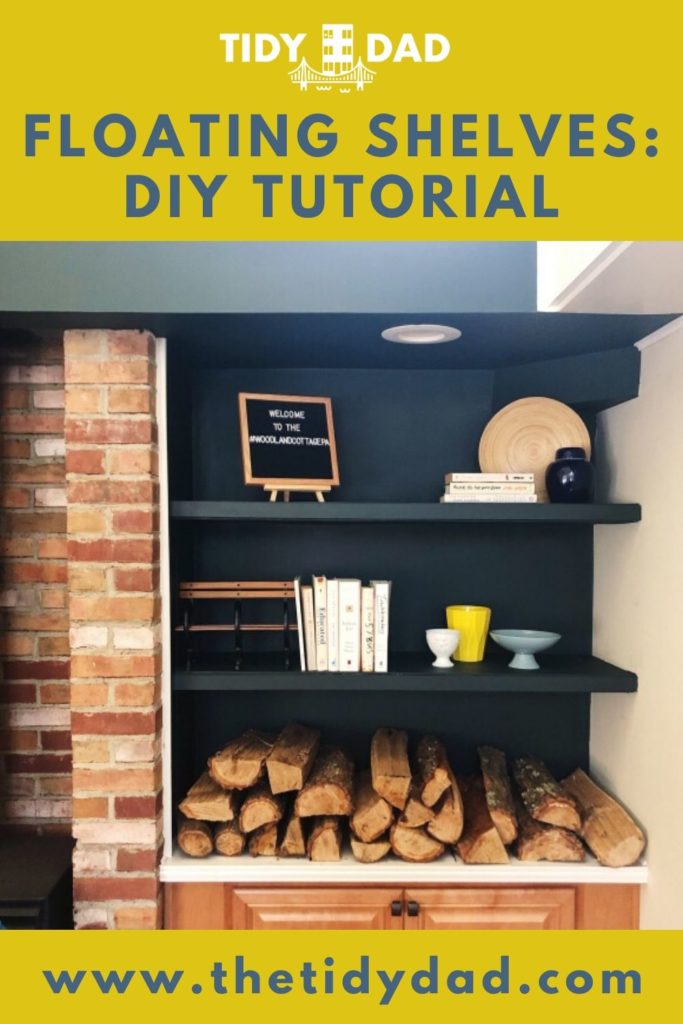
We repeated the process for creating a frame for each of the other floating shelves. Then we hung one shelf on the left side of the stove, over the television. We hung two shelves on the right side of the stove, with the top shelf on each side of the alcove hung at the same height to create a balanced look.
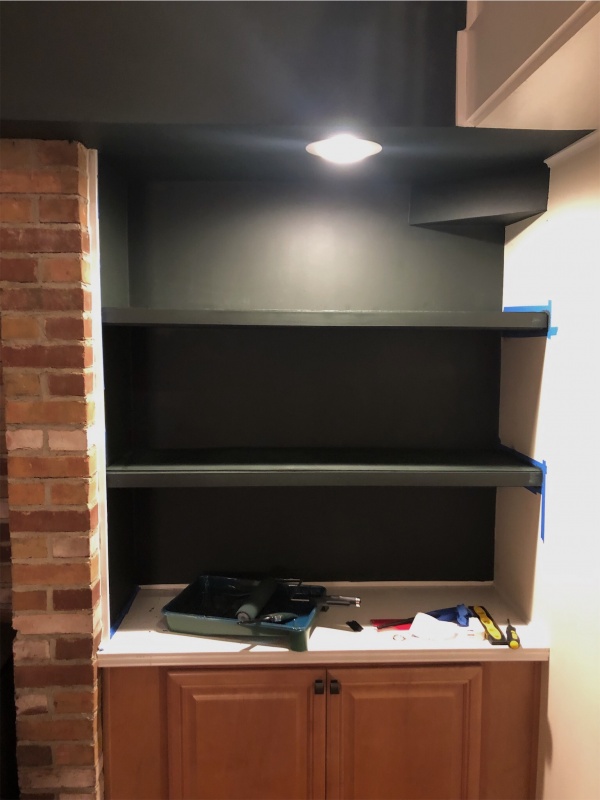
The next step was to particle board strips to the top and bottom of the frames, creating the flat shelf surfaces. I also painted the top, bottom, and sides of the shelves the same Jasper green color as the wall.
Completed Project
We love how it turned out! The deep color adds a visual depth to the alcoves. The floating shelves are the perfect place for us to add personal touches to the room.
Some of the links in this post are affiliate links. We may make a small commission for purchases made through these links with no additional fee to the customer. We only link to products we use and love! Thank you for supporting our blog!
Thanks for pinning!
More from the blog!

Hi, I'm Tidy Dad!
Tyler Moore is the bestselling author of "Tidy Up Your Life" and creator of the
"Tidy Dad" Instagram, TikTok, and website. A NYC public school teacher, husband, and father of three, he’s been featured on The Today Show, Good Morning America, The Washington Post, The New York Times, HGTV, and more. Tyler lives with his wife, Emily and their daughters in Queens, NY, and spends summers at their tidy cottage in the Poconos.
May 18, 2020
Floating Shelves

Browse All
parenting & Daily Living

Browse All
Tidying & Organizing

Browse All
Meal Planning & Cooking
More about tidy dad

Browse All
recipes
join over 35,000 subscribers
Subscribe to the tidy times!

Browse All
NYC Adventures


Browse All
Tidy Toolkit Resources
Order Tidy Dad's bestselling book!
join over 35,000 subscribers
Tidy Dad's monthly newsletter
My Favorite Project
My favorite project we’ve completed at the Woodland Cottage in Pennsylvania so far are the floating shelves and dark green wall surrounding our wood burning stove! My dad and I worked together to create a custom design, cut the wood, and install floating shelves in the two alcoves. It has made such a difference in the overall visual design of the room!
We started building the shelves one evening as soon as the girls went to bed. We worked late into the night while the house was quiet, and added the finishing touches the next day.
Envisioning The Project
When Emily and I purchased this home, we spent time designing the layout for the living area and choosing the furnishings. The previous owner had added low built-in cabinets on both sides of the stove. We thought that the alcove spaces looked unfinished. We wanted to add visual warmth and depth to the space.
Adding Paint
I started by painting the alcoves and the angled wall above the alcoves a deep Jasper green. We love how the dark color added a richness to the space and how it accentuated the leather sofa and navy chairs.
Emily and I also researched several pre-made floating shelving options for the space. The alcoves look symmetrical, but they do not actually have identical dimensions. That made it difficult to find pre-made options that would perfectly fill the space. I decided to create custom DIY floating shelves with my dad.
Designing and Building Floating Shelves
My dad and I researched several DIY floating shelves options and drew up a few mock-up plans. We finally decided to build the floating shelves out of 2 x 2 x 8 boards to create the frame. We added particle board strips to the top and bottom of the shelves.
The frame was designed to be drilled into the wall studs. The first step was to cut two large strips of the 2 x 2 x 8 boards to be the front and back of the frame. Then we cut 4 smaller strips to connect the front and back strips. We then drilled the pieces together to complete the frame for the first of the floating shelves, and screwed the frame into the wall. My DEWALT cordless drill made the assembly process so easy!
We repeated the process for creating a frame for each of the other floating shelves. Then we hung one shelf on the left side of the stove, over the television. We hung two shelves on the right side of the stove, with the top shelf on each side of the alcove hung at the same height to create a balanced look.
The next step was to particle board strips to the top and bottom of the frames, creating the flat shelf surfaces. I also painted the top, bottom, and sides of the shelves the same Jasper green color as the wall.
Completed Project
We love how it turned out! The deep color adds a visual depth to the alcoves. The floating shelves are the perfect place for us to add personal touches to the room.
Some of the links in this post are affiliate links. We may make a small commission for purchases made through these links with no additional fee to the customer. We only link to products we use and love! Thank you for supporting our blog!
Thanks for pinning!
More from the blog!
May 18, 2020
Floating Shelves
Hi, I'm Tidy Dad!
Tyler Moore is the creator of the “Tidy Dad” Instagram, TikTok, and website. A public school teacher in New York City, husband, and father of three young daughters, he has been featured on Good Morning America and in The Washington Post, The New York Times, New York Post, Better Homes & Gardens Secrets of Getting Organized magazine, Apartment Therapy, and many podcasts including HGTV and Minimalist Moms. During the school year, he lives with his wife, Emily, a pediatric occupational therapist, and three daughters in Queens, New York. In the summer, they spend as much time as possible in their small but tidy cottage in the Poconos.

")
welcome to the tribe!
i'll be sending you an e-mail soon!
so be on the lookout in your inbox!


