
Woodland Cottage Entryway
It is essential to have a functional entryway to a house, as it is the location people enter and exit every time they come into the home. Our Woodland Cottage is completely surrounded by trees and the driveway is located directly off the back deck of the house. While there is a walkway from the driveway to the front of the house, the most direct way to enter the house is through the back door. The more time we’ve spent in the house, the more we’ve come to realize that we will probably never enter and exit the house through the “front door”, but will almost always enter and exit through the doorway on the back deck.
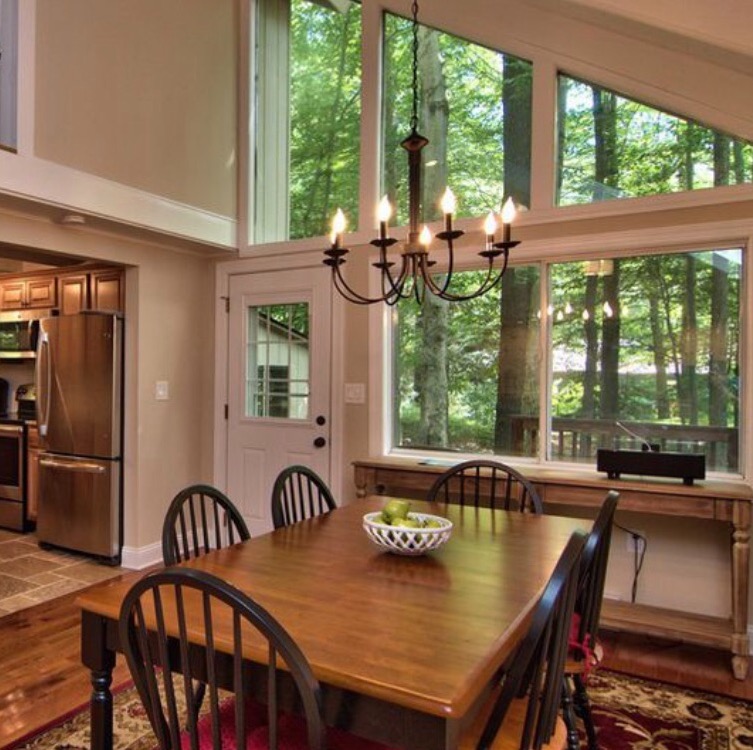
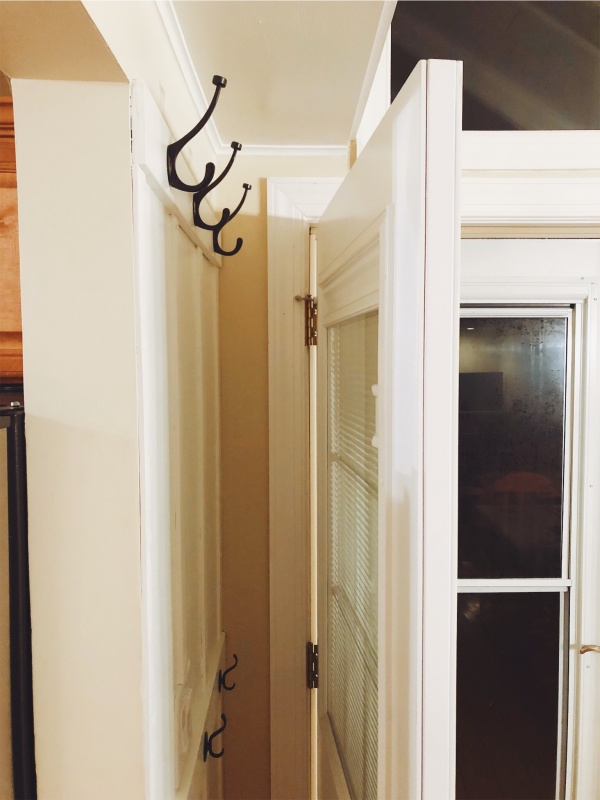
The above photo is from the original listing. Once the home was ours, we quickly realized that we needed a place to hang coats and bags by this door. There was not a coat closet or any other “entryway” storage near this door. We wanted to use the empty area by the door to create a few simple storage solutions.
Apartment Entryway
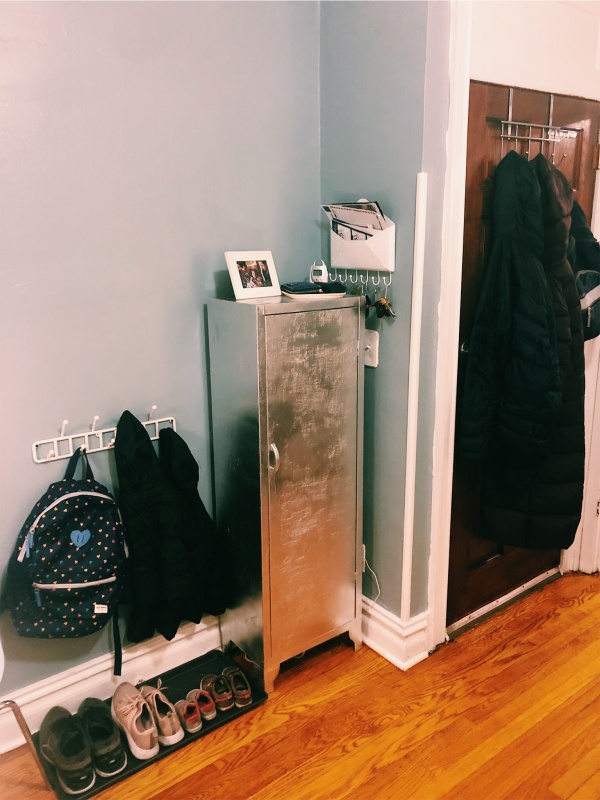
We had faced a similar problem in our NYC apartment entryway. In our apartment, the front door opens directly into the living room, and we did not have a coat closet or any other kind of “entryway” storage.
We hung a few over-the-door hooks on the back of our front door for adult coats and bags. We hung a row of hooks at a height accessible to the girls for their coats and backpacks. We placed a shoe tray directly underneath, which helps so much with keeping wet or snowy shoes contained.
We repurposed an old metal locker that I found on the sidewalk on trash day! I spray painted it silver and we organized the interior shelves with baskets for gloves, hats, and winter gear. Then we switch the baskets to park toys, swimsuits, beach towels, and picnic blankets in the summer!
We also wanted a spot next to the cabinet to place mail when we come inside. We hung this cute metal envelope holder, and it includes 6 hooks for keys. We put a small tray on top of the cabinet to store wallets, glasses and anything else we need to drop from our pockets.
This new system dramatically transformed our entire getting-out-the-door routine, because we no longer needed to walk to bedrooms for coats, shoes, or gloves. We love that our bags and keys are now easy to locate and grab on the way out too.
Our Solution – DIY Hook Wall
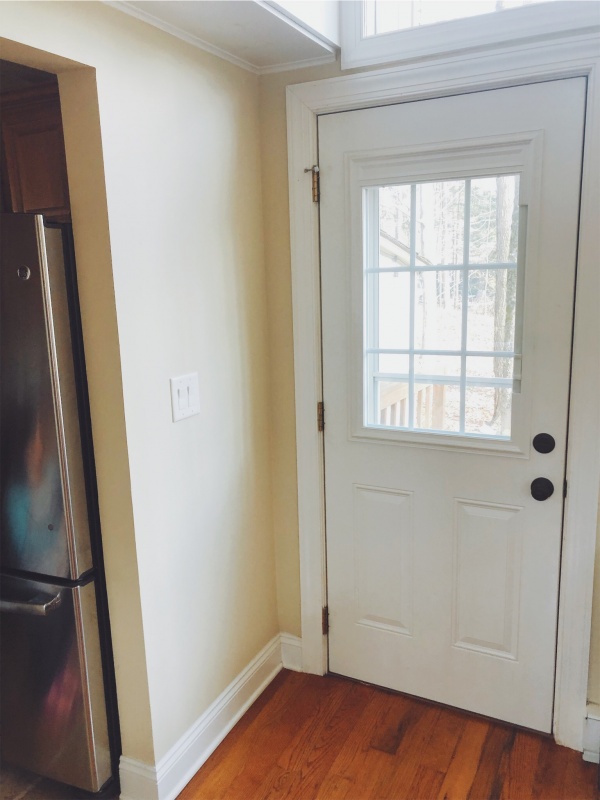
We wanted to incorporate some of these same solutions into our space at the new house. The wall behind the house door was a blank canvas, and unlike in our apartment, we were able to build any sort of custom system that we wanted! After renting apartments for 10+ years, being able to build whatever we want for the space is really fun!
We decided our first priority was to create a DIY “hook wall”, to provide space for coats and bags to be hung securely.
Planning to Build
The blank wall behind the door measures 30 inches wide, by about 7.5 feet to the top of the kitchen entryway, which was the height we wanted to match. We decided to build a DIY hook wall, with “board and batten” and 2 rows of hooks. We drew several sketches on paper before finalizing our design. We considered the heights for both the top hooks and the lower hooks, as well as the spacing of the vertical slats on the wall. We also needed to build around the light switch in the middle of the wall. Once we finalized our design, it was time to buy the supplies!
Materials
- 1-in x 6-in x 8-ft primed pine boards (3)
- 3 2-1/4-in x 7-ft 6-in interior MDF casing boards (1)
- 2 1/2 inch screws (wood)
- White finish nails
- High gloss enamel paint (ours was tinted decorator white to match our trim)
- 6 hooks
- Hammer
- Electric drill – I just got this one for Christmas, and it is an amazing drill!
- Table saw
- Measuring tape
- Level
Building Process
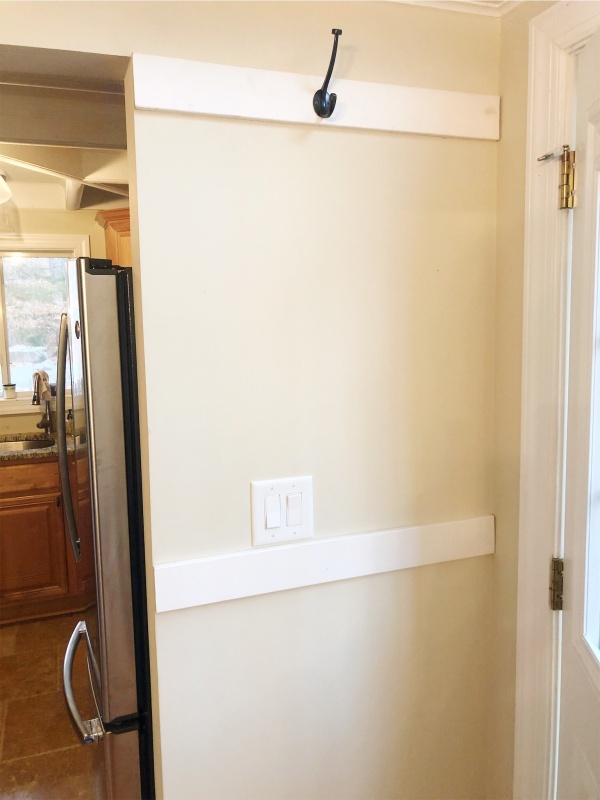
First, we cut two strips out of the 2-1/4-in x 7-ft 6-in MDF, and screwed those into the studs. We attached our first hook in the center of the top board.
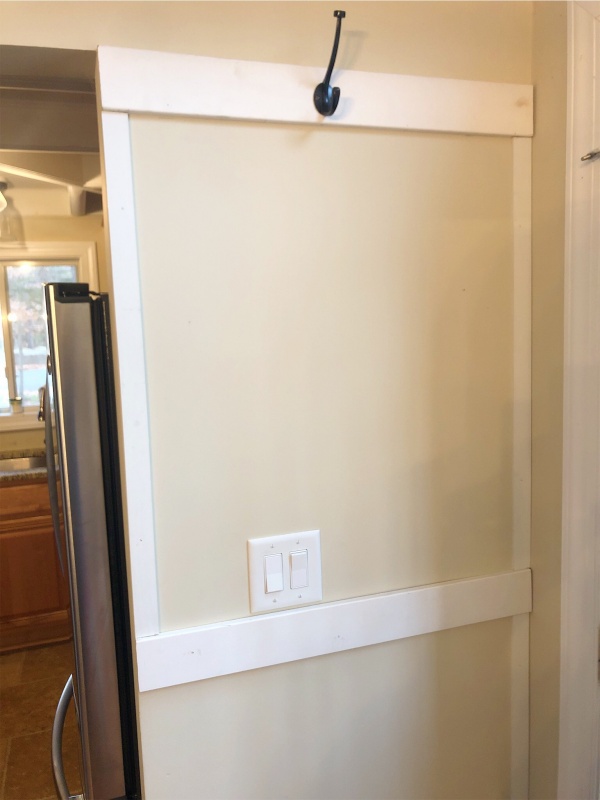
Next, we measured the vertical space between the two horizontal strips, and then measured and cut the vertical 1-in x 6-in x 8-ft pine boards. We nailed two strips to the outside of the edges of the walls using finishing nails.
Then we cut one vertical board a bit shorter to fit around the light switch!
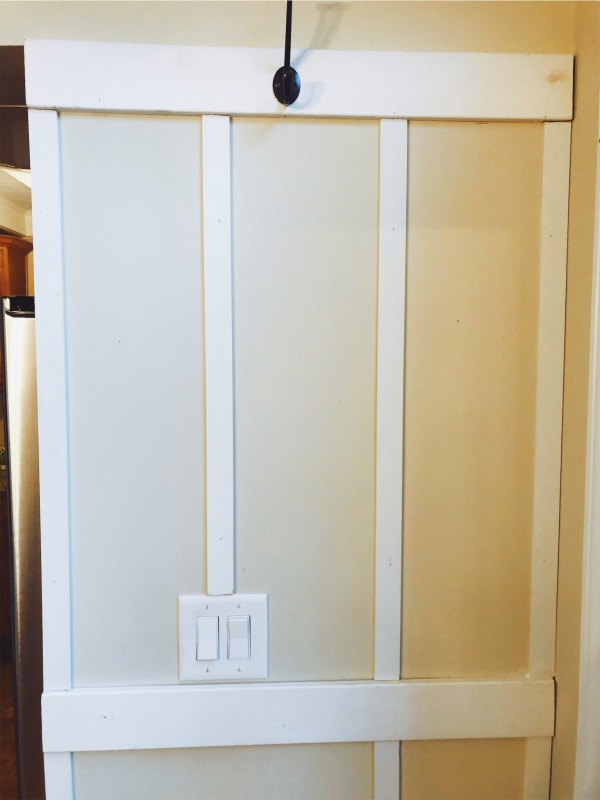
We continued adding boards to complete the top and bottom section of the hook wall. Before nailing each vertical strip, we leveled the top and bottom of the strips to ensure that they were straight.
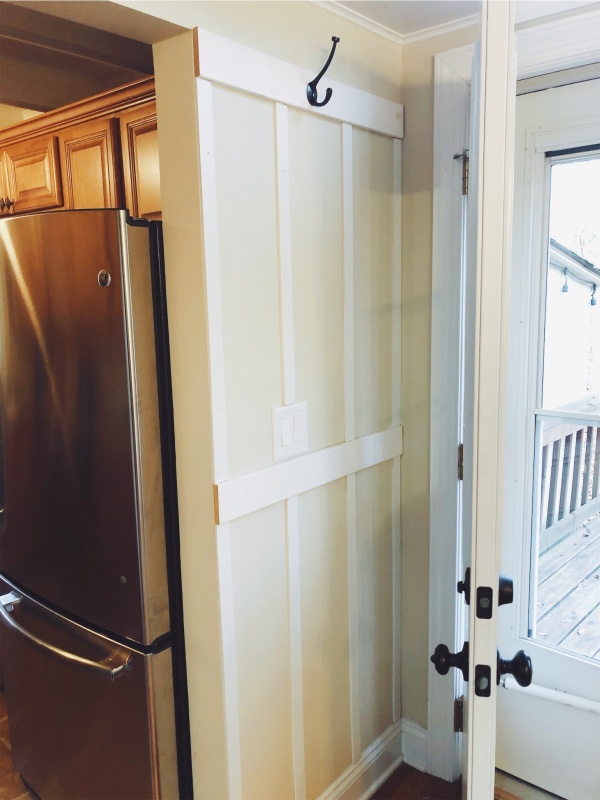
Then it was time to paint! We removed that top hook, and I painted the entire wall with two coats of high gloss white. We chose an enamel paint that matched the trim in the rest of the house. The paint gives the overall hook wall a nice finished look!
After the wall dried, we drilled the 6 coat hooks into place. We lined up the bottom hooks with the top hooks, giving the hook wall a symmetrical look. Our girls are small, so having hooks that were accessible to them was really important.
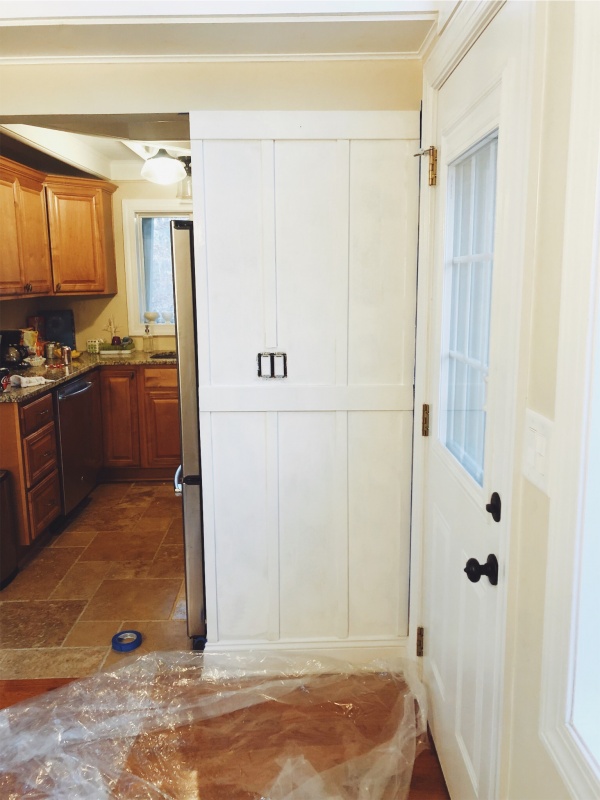
Finished Product
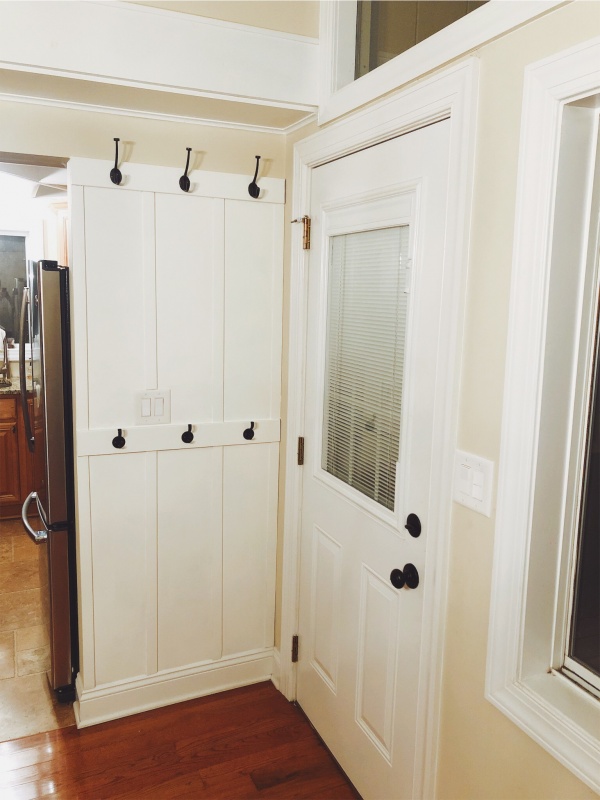
The finished DIY hook wall is simple in design and scale, yet beautifully provides a place for people to hang coats and bags. The area behind the door is typically an underutilized area in a house, but can be used in a really handy way. Over Christmas break we hosted 10 people at the house and it was remarkable how much this little wall can hold!
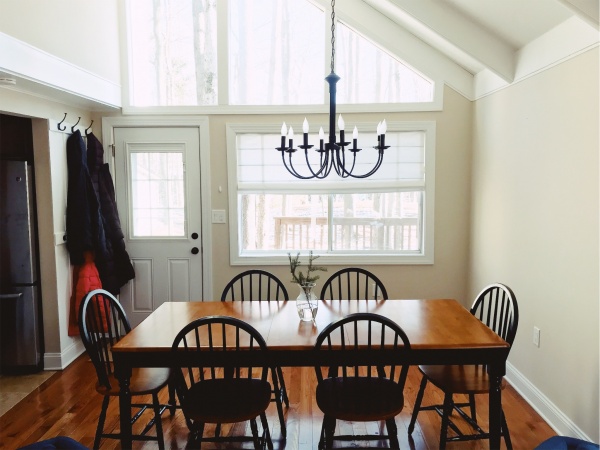
We also added 3 shoe trays along the wall under the large window, and a few small command hooks between the door and window to hold our keys. Eventually we’d like to add a long table or bench under the window, but for now we are pleased with the increased storage and efficiency of these current simple solutions!
_________________________________________________________________________________
This post contains affiliate links. We may make a small commission for purchases made through these links with no additional fee to the customer. We only link to products we use and love! Thank you for supporting our blog!
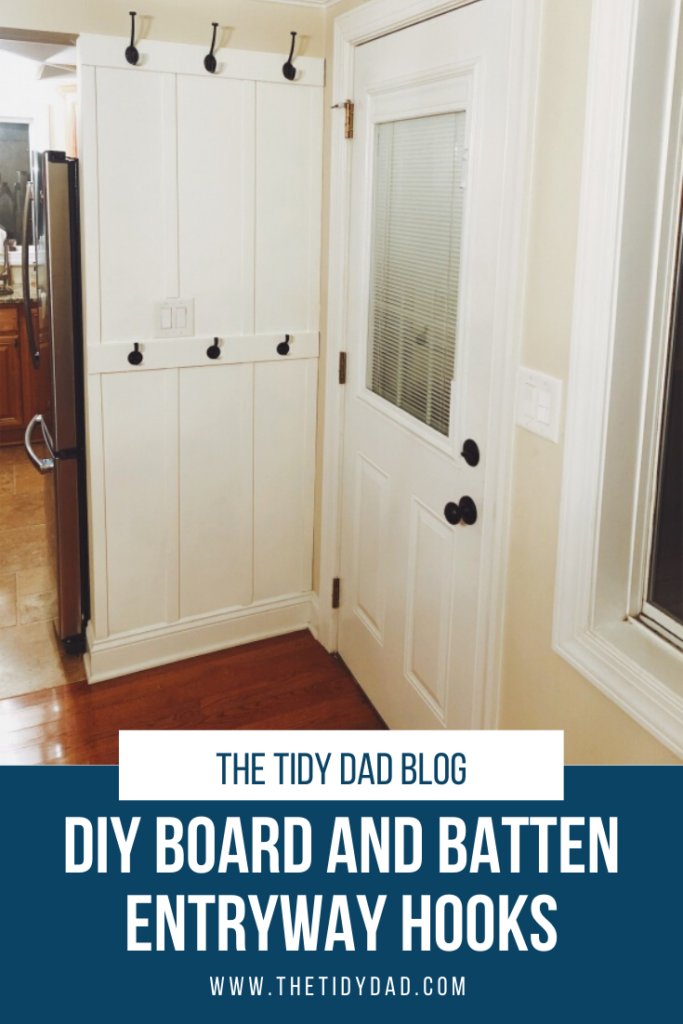
Thanks for Pinning!
More from thetidydad.com

Hi, I'm Tidy Dad!
Tyler Moore is the bestselling author of "Tidy Up Your Life" and creator of the
"Tidy Dad" Instagram, TikTok, and website. A NYC public school teacher, husband, and father of three, he’s been featured on The Today Show, Good Morning America, The Washington Post, The New York Times, HGTV, and more. Tyler lives with his wife, Emily and their daughters in Queens, NY, and spends summers at their tidy cottage in the Poconos.
January 28, 2020
DIY Hook Wall

Browse All
parenting & Daily Living

Browse All
Tidying & Organizing

Browse All
Meal Planning & Cooking
More about tidy dad

Browse All
recipes
join over 35,000 subscribers
Subscribe to the tidy times!

Browse All
NYC Adventures


Browse All
Tidy Toolkit Resources
Order Tidy Dad's bestselling book!
join over 35,000 subscribers
Tidy Dad's monthly newsletter
Woodland Cottage Entryway
It is essential to have a functional entryway to a house, as it is the location people enter and exit every time they come into the home. Our Woodland Cottage is completely surrounded by trees and the driveway is located directly off the back deck of the house. While there is a walkway from the driveway to the front of the house, the most direct way to enter the house is through the back door. The more time we’ve spent in the house, the more we’ve come to realize that we will probably never enter and exit the house through the “front door”, but will almost always enter and exit through the doorway on the back deck.
The above photo is from the original listing. Once the home was ours, we quickly realized that we needed a place to hang coats and bags by this door. There was not a coat closet or any other “entryway” storage near this door. We wanted to use the empty area by the door to create a few simple storage solutions.
Apartment Entryway
We had faced a similar problem in our NYC apartment entryway. In our apartment, the front door opens directly into the living room, and we did not have a coat closet or any other kind of “entryway” storage.
We hung a few over-the-door hooks on the back of our front door for adult coats and bags. We hung a row of hooks at a height accessible to the girls for their coats and backpacks. We placed a shoe tray directly underneath, which helps so much with keeping wet or snowy shoes contained.
We repurposed an old metal locker that I found on the sidewalk on trash day! I spray painted it silver and we organized the interior shelves with baskets for gloves, hats, and winter gear. Then we switch the baskets to park toys, swimsuits, beach towels, and picnic blankets in the summer!
We also wanted a spot next to the cabinet to place mail when we come inside. We hung this cute metal envelope holder, and it includes 6 hooks for keys. We put a small tray on top of the cabinet to store wallets, glasses and anything else we need to drop from our pockets.
This new system dramatically transformed our entire getting-out-the-door routine, because we no longer needed to walk to bedrooms for coats, shoes, or gloves. We love that our bags and keys are now easy to locate and grab on the way out too.
Our Solution – DIY Hook Wall
We wanted to incorporate some of these same solutions into our space at the new house. The wall behind the house door was a blank canvas, and unlike in our apartment, we were able to build any sort of custom system that we wanted! After renting apartments for 10+ years, being able to build whatever we want for the space is really fun!
We decided our first priority was to create a DIY “hook wall”, to provide space for coats and bags to be hung securely.
Planning to Build
The blank wall behind the door measures 30 inches wide, by about 7.5 feet to the top of the kitchen entryway, which was the height we wanted to match. We decided to build a DIY hook wall, with “board and batten” and 2 rows of hooks. We drew several sketches on paper before finalizing our design. We considered the heights for both the top hooks and the lower hooks, as well as the spacing of the vertical slats on the wall. We also needed to build around the light switch in the middle of the wall. Once we finalized our design, it was time to buy the supplies!
Materials
- 1-in x 6-in x 8-ft primed pine boards (3)
- 3 2-1/4-in x 7-ft 6-in interior MDF casing boards (1)
- 2 1/2 inch screws (wood)
- White finish nails
- High gloss enamel paint (ours was tinted decorator white to match our trim)
- 6 hooks
- Hammer
- Electric drill – I just got this one for Christmas, and it is an amazing drill!
- Table saw
- Measuring tape
- Level
Building Process
First, we cut two strips out of the 2-1/4-in x 7-ft 6-in MDF, and screwed those into the studs. We attached our first hook in the center of the top board.
Next, we measured the vertical space between the two horizontal strips, and then measured and cut the vertical 1-in x 6-in x 8-ft pine boards. We nailed two strips to the outside of the edges of the walls using finishing nails.
Then we cut one vertical board a bit shorter to fit around the light switch!
We continued adding boards to complete the top and bottom section of the hook wall. Before nailing each vertical strip, we leveled the top and bottom of the strips to ensure that they were straight.
Then it was time to paint! We removed that top hook, and I painted the entire wall with two coats of high gloss white. We chose an enamel paint that matched the trim in the rest of the house. The paint gives the overall hook wall a nice finished look!
After the wall dried, we drilled the 6 coat hooks into place. We lined up the bottom hooks with the top hooks, giving the hook wall a symmetrical look. Our girls are small, so having hooks that were accessible to them was really important.
Finished Product
The finished DIY hook wall is simple in design and scale, yet beautifully provides a place for people to hang coats and bags. The area behind the door is typically an underutilized area in a house, but can be used in a really handy way. Over Christmas break we hosted 10 people at the house and it was remarkable how much this little wall can hold!
We also added 3 shoe trays along the wall under the large window, and a few small command hooks between the door and window to hold our keys. Eventually we’d like to add a long table or bench under the window, but for now we are pleased with the increased storage and efficiency of these current simple solutions!
_________________________________________________________________________________
This post contains affiliate links. We may make a small commission for purchases made through these links with no additional fee to the customer. We only link to products we use and love! Thank you for supporting our blog!
Thanks for Pinning!
More from thetidydad.com
January 28, 2020
DIY Hook Wall
Hi, I'm Tidy Dad!
Tyler Moore is the creator of the “Tidy Dad” Instagram, TikTok, and website. A public school teacher in New York City, husband, and father of three young daughters, he has been featured on Good Morning America and in The Washington Post, The New York Times, New York Post, Better Homes & Gardens Secrets of Getting Organized magazine, Apartment Therapy, and many podcasts including HGTV and Minimalist Moms. During the school year, he lives with his wife, Emily, a pediatric occupational therapist, and three daughters in Queens, New York. In the summer, they spend as much time as possible in their small but tidy cottage in the Poconos.

")
welcome to the tribe!
i'll be sending you an e-mail soon!
so be on the lookout in your inbox!


