
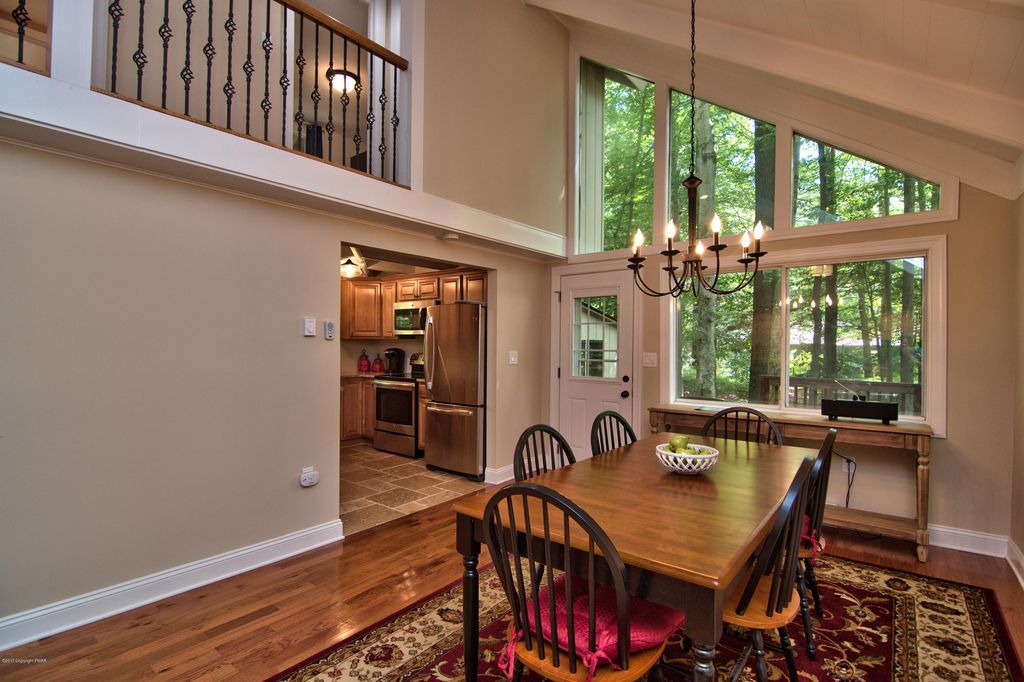
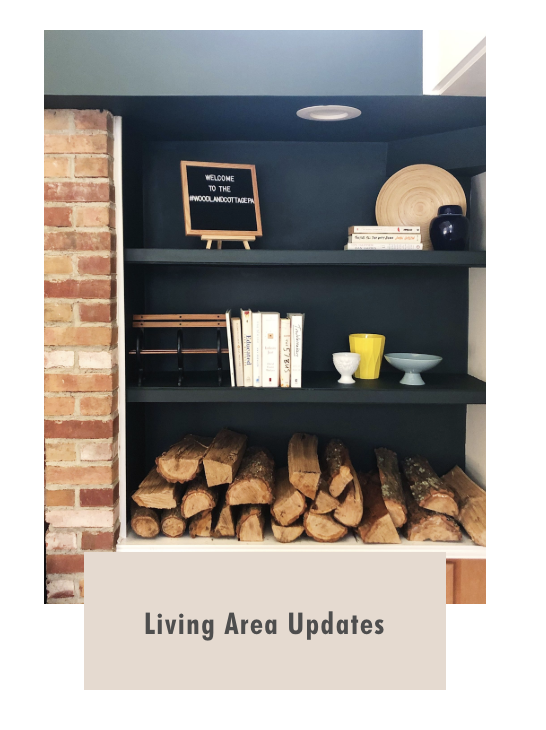
We recently purchased a home in Pennsylvania, (see Our Newest Project and House Hunting) and the large living area with huge windows that overlook the great outdoors was a big selling-point for us. The space is open to the kitchen, and has enough room for a dining table and an entertainment area next to the wood-burning stove. It is a space where we can comfortably host family and friends. It is a room we hope will be ideal for short-term renters to use during their stays as well.
Our first task after purchasing the house was to get the bedrooms comfortable enough to stay in. We started by purchasing bed frames, bunk bed mattresses, queen size mattresses, bed sheet sets, and duvet comforters.
Next, our attention turned to the living area design. During the sale, we negotiated the inclusion of the dining table with chairs, and the leather sleeper sofa. Other than those items, the room has remained mostly empty.
Living Area Design Challenges
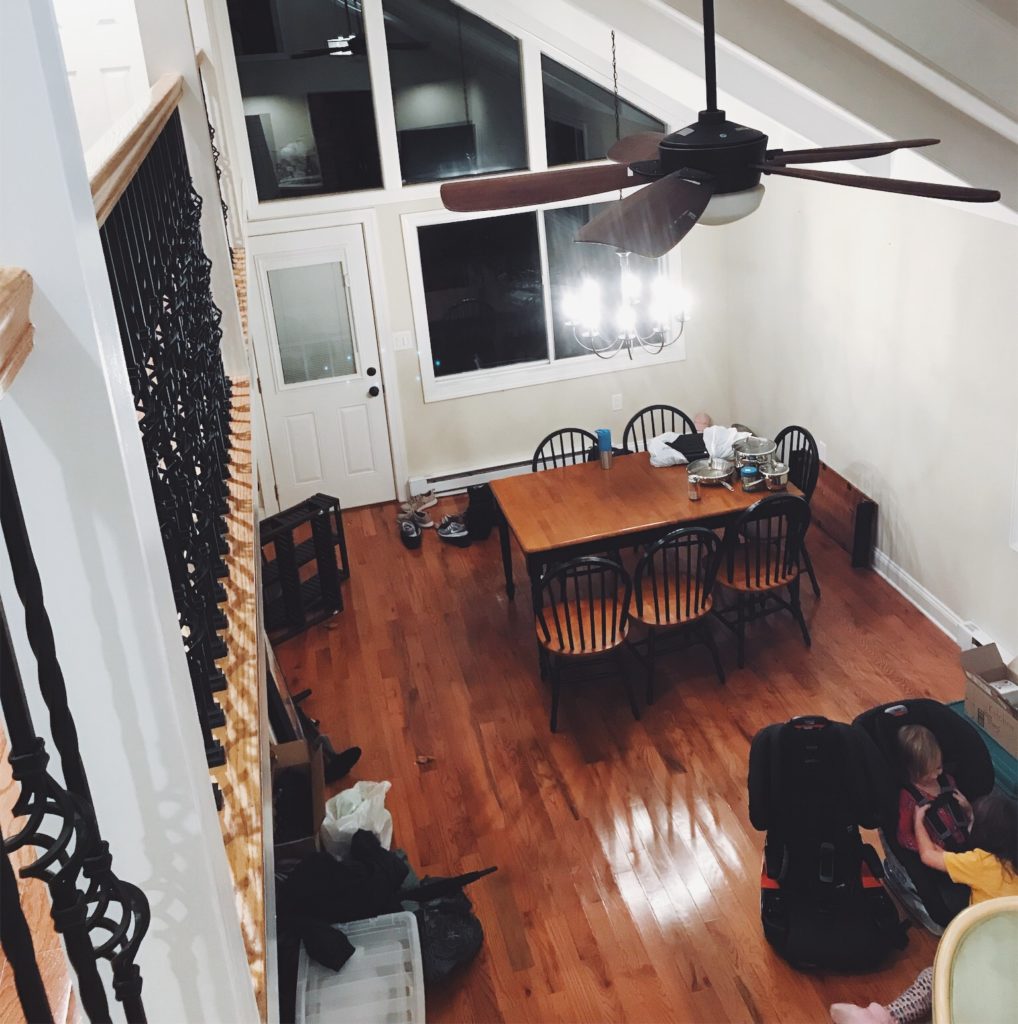
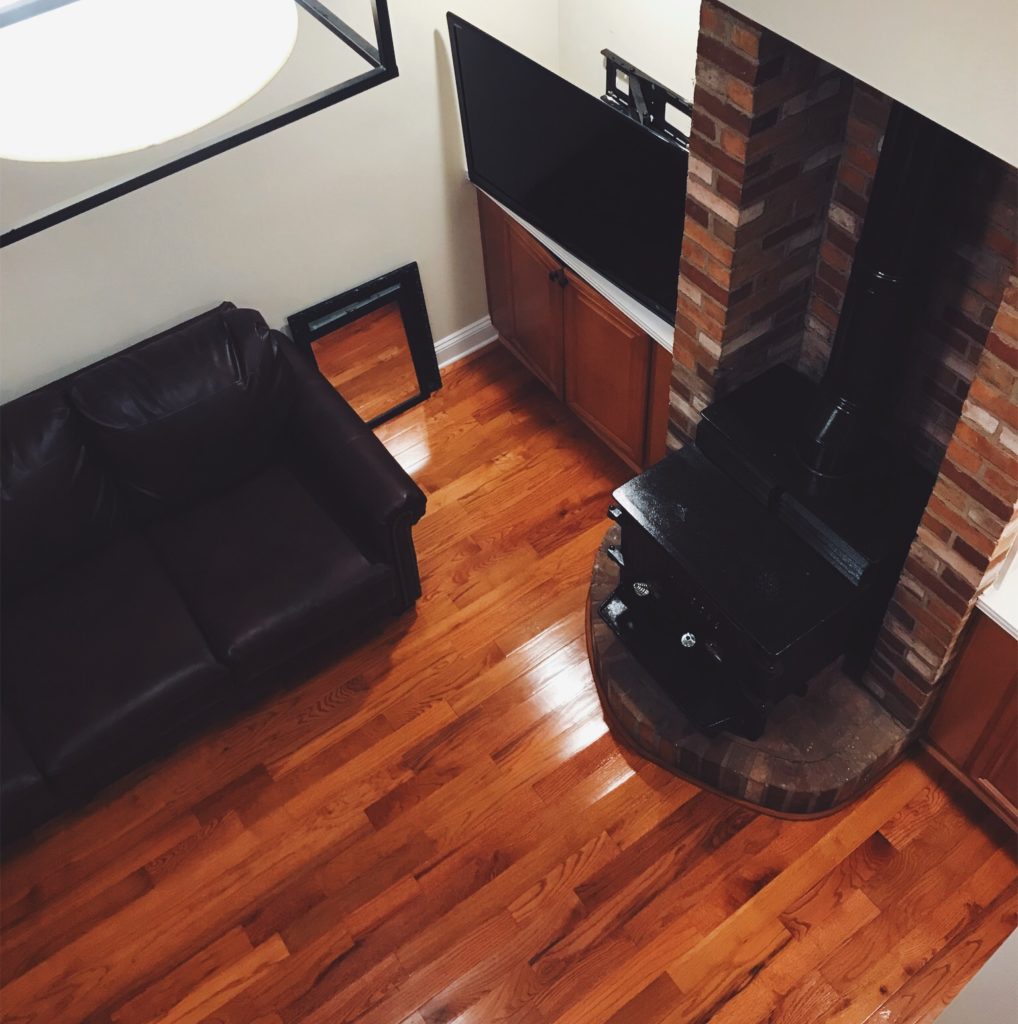
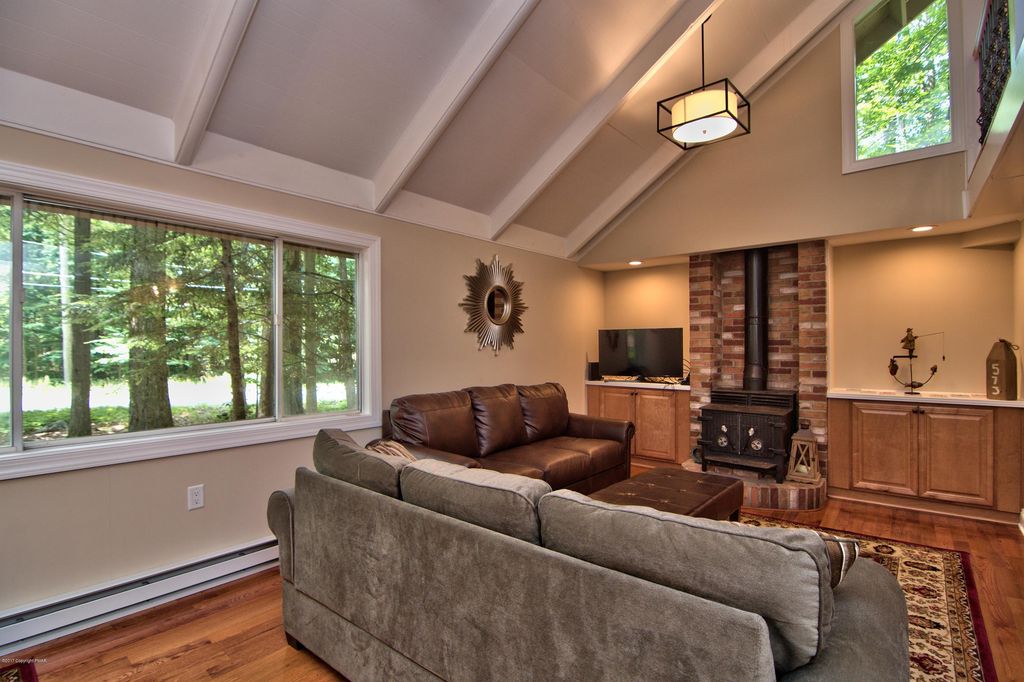
The living area design has presented us with some challenges. Here are some photos of the space from the previous owners:
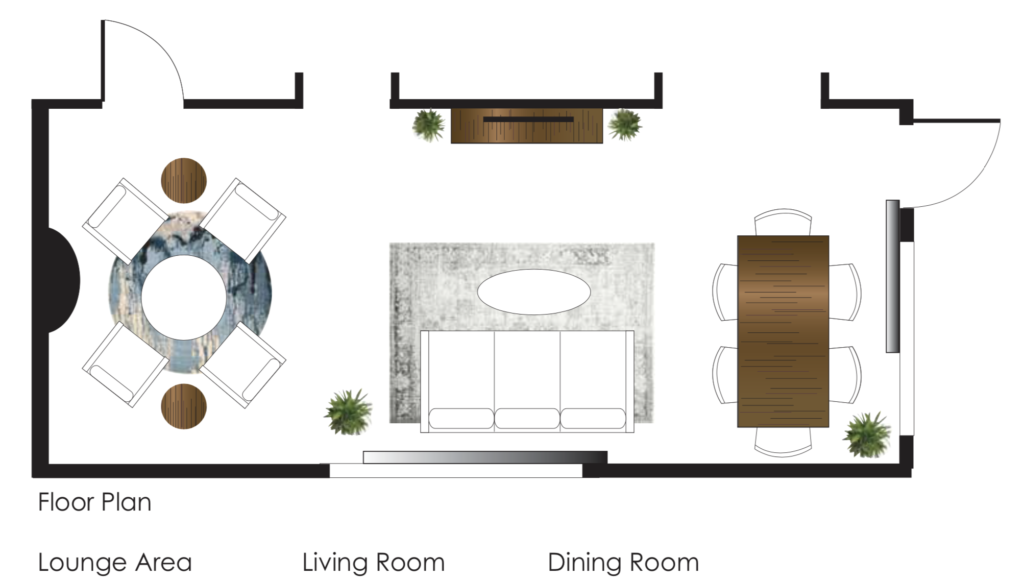
The room is long and narrow, measuring 28 feet long by 11 feet wide. Baseboard heaters on two of the walls (under both of the large windows) limit where furniture can be placed. The previous owners zoned the living area design into two distinct spaces: dining and entertainment.
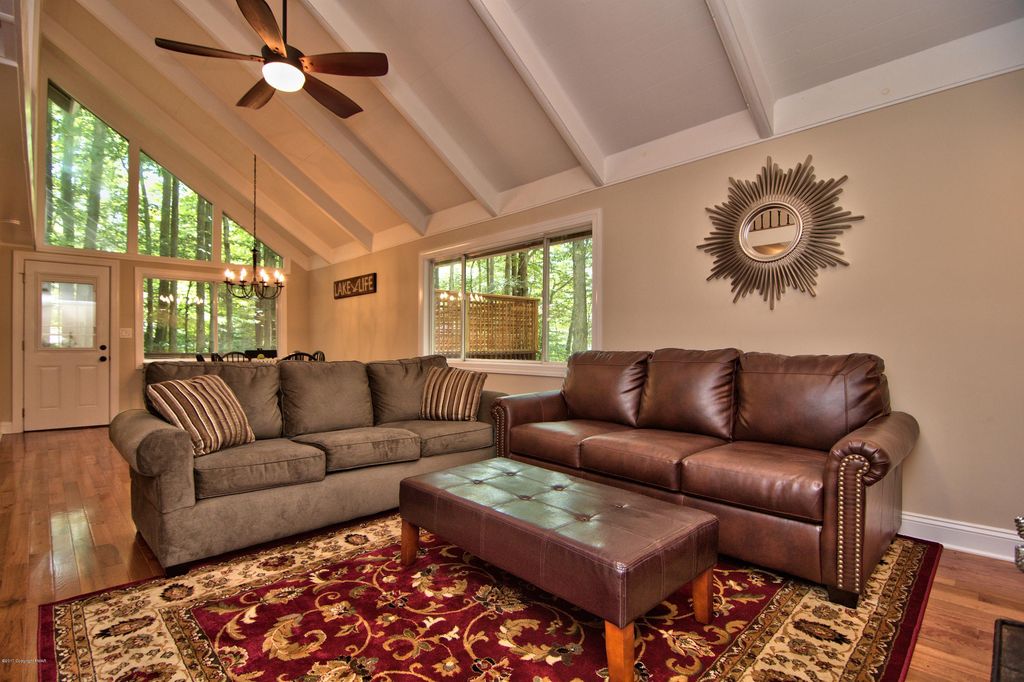
The dining area was located directly next to the kitchen. The entertainment area had two sofas that were placed into an “L”, with one couch directly facing the television and wood burning stove.
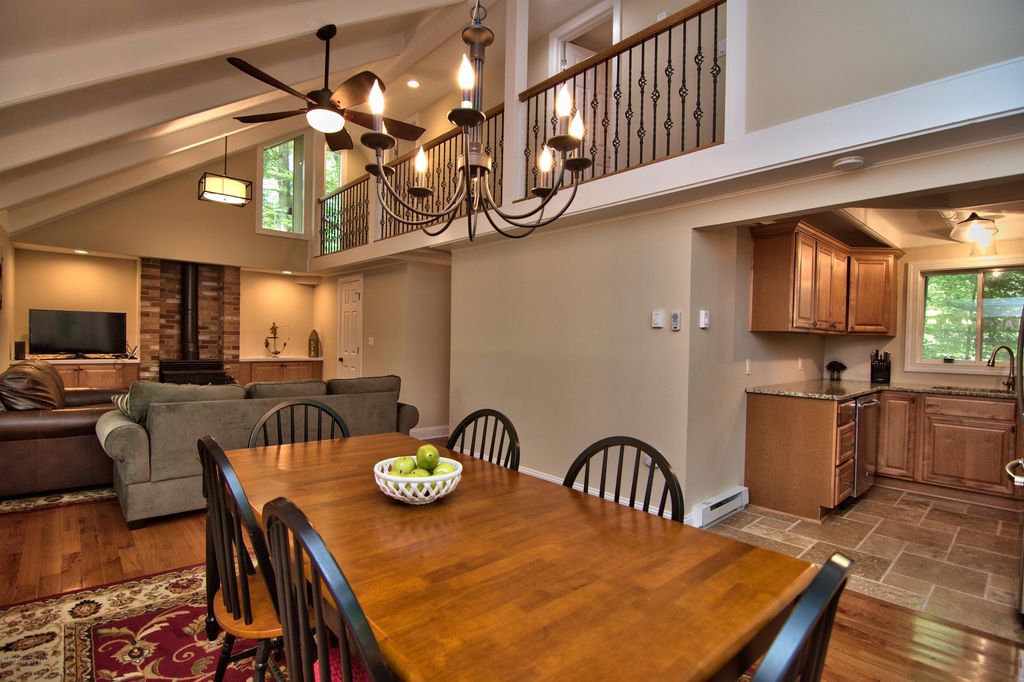
One wall of the room has a wood-burning stove, with low built-in storage cabinets on either side. The plugs for the television are restricted to the left side of the wood-burning stove. There are entrances to the bathroom, the hallway, and the kitchen directly off one side of the living space.
We didn’t love that the original couch layout divided the large room into two very separate spaces. But we’ve also been really struggling with creating a new layout for this space, due to the constraints of the room (TV location, baseboard heaters, doorways).
Envisioning our Ideal Lifestyle
As Emily and I envisioned together what our ideal lifestyle would look like in the living area, we quickly discerned that we didn’t want to orient the room around the television. We wanted to create a living area design that was open and inviting. The room needed to be divided into zones, while still feeling like one cohesive space. We wanted to fully utilize the square footage of the room. The girls needed to have some open space to play. We also wanted to highlight these beautiful windows! We wanted to create a room that allowed us to look towards the windows, rather than sitting with our backs to them.
Design Help from INCASA
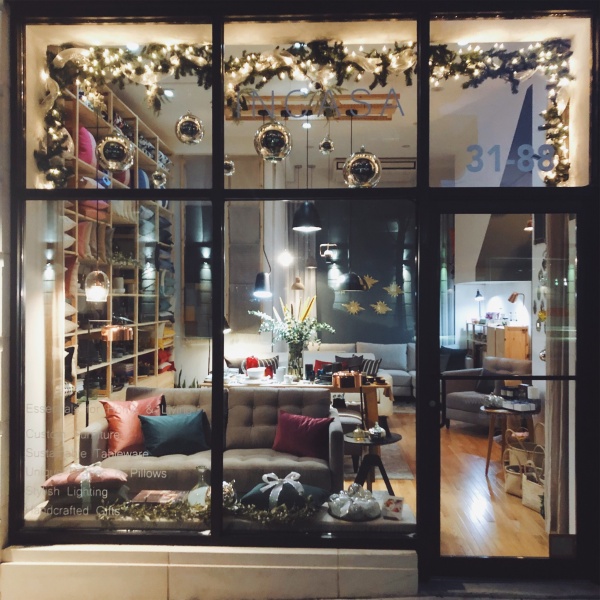
Emily and I were happy with our list of desires for the space, but we still weren’t sure how to design a room that could achieve everything we wanted. We decided to reach out to Astoria-based design firm INCASA. I walk past their lovely shop on my way to work each morning. I love peeking in the window and seeing their beautiful designs.
The owners, Eduardo and Delia, gifted us a complimentary design consultation and space planning services. They work closely with clients to develop personalized solutions that transform their space. They can deliver realistic designs of a room, filled with pieces of furniture that can help to envision the possibilities for a space! INCASA also designs and sells custom drapery and furniture.
There are many e-design firms on the market, but for this project we really wanted to “shop local.” INCASA provided us with care and attention and were incredibly thoughtful partners. The layout for our living space was incredibly important to us, so we wanted to consult with design experts before we made any furniture purchases.
Design Layouts
Prior to our initial design consultation, we emailed photos of the current living space and provided measurements of the room. We met with Eduardo and Delia in their showroom in Astoria, Queens to share with them our ideal vision for what we wanted and needed from the space.
Within days of our meeting, we were sent our first living area design. We loved seeing the beautiful rendering of the room! Eduardo and Delia had carefully considered the intentions we desired for the space and how to cohesively connect the living zones.
After reviewing the design, we provided feedback on what we liked and didn’t like about the images and they updated the design for us. We went through 2 revisions before we landed on a design that we felt was PERFECT for the room!
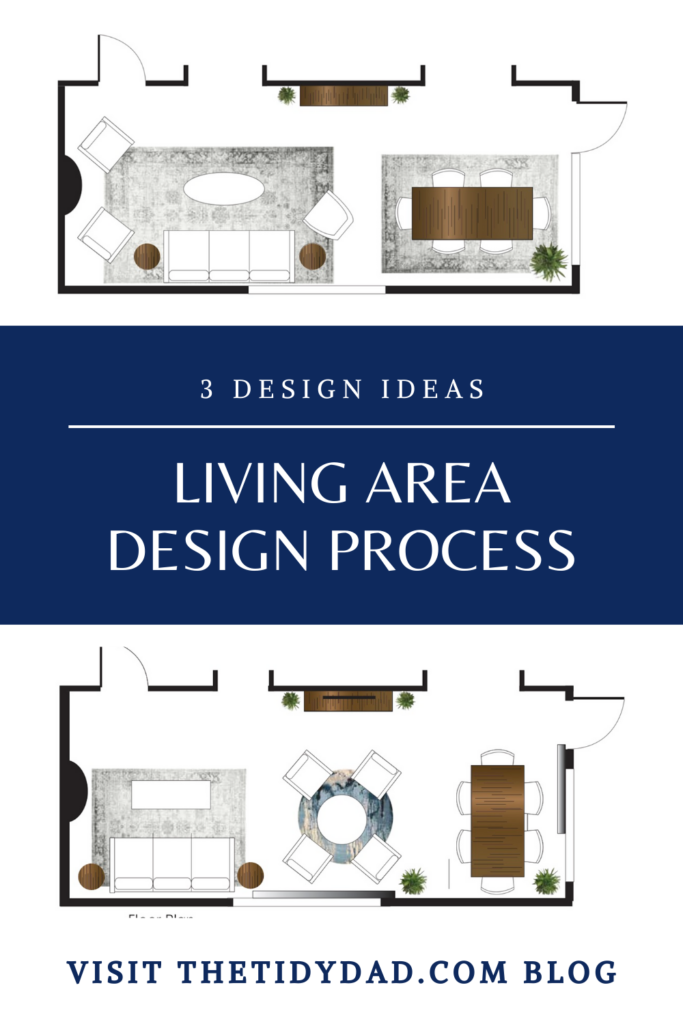
Design 1

What we Like: The removal of the second sofa makes the room feel more like one large space. The credenza opposite the side window is a perfect location for extra storage. The addition of lounge chairs is a great way to comfortably sit, while being oriented towards the windows.
Ideas for Revision: The room feels so much larger in this design! We’d love to have it set up to include a lounge area with a game table, in addition to the couch area.
Design 2
The second option incorporated our feedback and showed how a lounge area could fit into the space.
What we Like: We love the addition of the lounge area to the design! This area provides so much flexibility, as it could be used as a seating area, game/puzzle area, or even for meals. The orientation of the dining table is perfect, as it still comfortably seats 6, but takes up less room in the overall layout. We also like the contrast between the circle and rectangle rug, and that there is not a rug under the dining table (crumb catcher!)
Idea for Revision: We love this design, but realized the placement of the couch will not work in that location due to the baseboard heaters directly under the window. The furniture needs to be 12 inches away from the heater, which would create an awkward gap and make it difficult to pull out the sleeper sofa. We’d love to switch the location of the lounge area with the living room area!
Design 3

What we Like: We love that there are now 3 zoned areas in the room, simply by shifting the orientation of the dining table. The location of the lounge area with a table in the middle of the room will allow for overflow dining space directly next to the dining table, if there are more than 6 people. The 4 lounge chairs will allow people to comfortably sit and enjoy the views out of the large windows. The couch area feels so much more open! The girls have space to play on the large floor rug, while still remaining in view if we are sitting in the lounge or dining area. We love this design!
Final Design
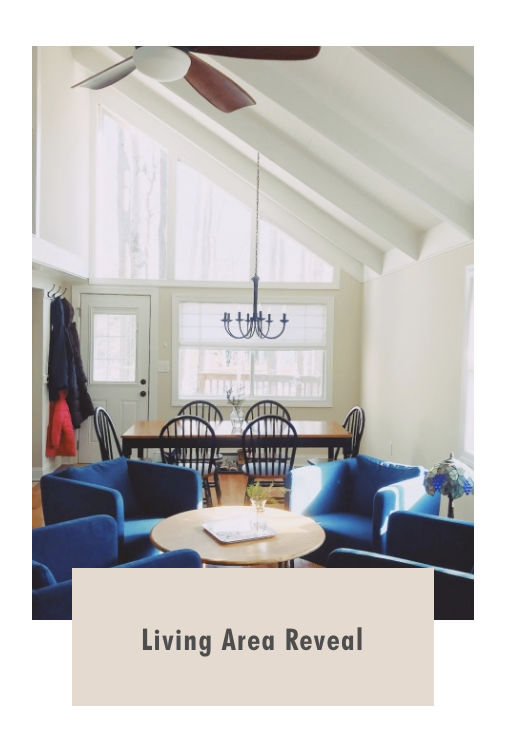
We are so happy with our 3rd living area design from INCASA. They also sent us this elevated image of the final layout.

Now that we have finalized the living area design, it is time to get to work! We have started making mood boards and ordering furniture. We are excited to see our vision start coming to life!
Thanks for pinning!
_____________________________________________________________________
This post contains affiliate links. We may make a small commission for purchases made through these links with no additional fee to the customer. We only link to products we use and love! Thank you for supporting our blog!
UPDATE: Check out MORE from Woodland Cottage:

Hi, I'm Tidy Dad!
Tyler Moore is the bestselling author of "Tidy Up Your Life" and creator of the
"Tidy Dad" Instagram, TikTok, and website. A NYC public school teacher, husband, and father of three, he’s been featured on The Today Show, Good Morning America, The Washington Post, The New York Times, HGTV, and more. Tyler lives with his wife, Emily and their daughters in Queens, NY, and spends summers at their tidy cottage in the Poconos.
December 20, 2019
Living Area Design

Browse All
parenting & Daily Living

Browse All
Tidying & Organizing

Browse All
Meal Planning & Cooking
More about tidy dad

Browse All
recipes
join over 35,000 subscribers
Subscribe to the tidy times!

Browse All
NYC Adventures


Browse All
Tidy Toolkit Resources
Order Tidy Dad's bestselling book!
join over 35,000 subscribers
Tidy Dad's monthly newsletter
We recently purchased a home in Pennsylvania, (see Our Newest Project and House Hunting) and the large living area with huge windows that overlook the great outdoors was a big selling-point for us. The space is open to the kitchen, and has enough room for a dining table and an entertainment area next to the wood-burning stove. It is a space where we can comfortably host family and friends. It is a room we hope will be ideal for short-term renters to use during their stays as well.
Our first task after purchasing the house was to get the bedrooms comfortable enough to stay in. We started by purchasing bed frames, bunk bed mattresses, queen size mattresses, bed sheet sets, and duvet comforters.
Next, our attention turned to the living area design. During the sale, we negotiated the inclusion of the dining table with chairs, and the leather sleeper sofa. Other than those items, the room has remained mostly empty.
Living Area Design Challenges
The living area design has presented us with some challenges. Here are some photos of the space from the previous owners:
The room is long and narrow, measuring 28 feet long by 11 feet wide. Baseboard heaters on two of the walls (under both of the large windows) limit where furniture can be placed. The previous owners zoned the living area design into two distinct spaces: dining and entertainment.
The dining area was located directly next to the kitchen. The entertainment area had two sofas that were placed into an “L”, with one couch directly facing the television and wood burning stove.
One wall of the room has a wood-burning stove, with low built-in storage cabinets on either side. The plugs for the television are restricted to the left side of the wood-burning stove. There are entrances to the bathroom, the hallway, and the kitchen directly off one side of the living space.
We didn’t love that the original couch layout divided the large room into two very separate spaces. But we’ve also been really struggling with creating a new layout for this space, due to the constraints of the room (TV location, baseboard heaters, doorways).
Envisioning our Ideal Lifestyle
As Emily and I envisioned together what our ideal lifestyle would look like in the living area, we quickly discerned that we didn’t want to orient the room around the television. We wanted to create a living area design that was open and inviting. The room needed to be divided into zones, while still feeling like one cohesive space. We wanted to fully utilize the square footage of the room. The girls needed to have some open space to play. We also wanted to highlight these beautiful windows! We wanted to create a room that allowed us to look towards the windows, rather than sitting with our backs to them.
Design Help from INCASA
Emily and I were happy with our list of desires for the space, but we still weren’t sure how to design a room that could achieve everything we wanted. We decided to reach out to Astoria-based design firm INCASA. I walk past their lovely shop on my way to work each morning. I love peeking in the window and seeing their beautiful designs.
The owners, Eduardo and Delia, gifted us a complimentary design consultation and space planning services. They work closely with clients to develop personalized solutions that transform their space. They can deliver realistic designs of a room, filled with pieces of furniture that can help to envision the possibilities for a space! INCASA also designs and sells custom drapery and furniture.
There are many e-design firms on the market, but for this project we really wanted to “shop local.” INCASA provided us with care and attention and were incredibly thoughtful partners. The layout for our living space was incredibly important to us, so we wanted to consult with design experts before we made any furniture purchases.
Design Layouts
Prior to our initial design consultation, we emailed photos of the current living space and provided measurements of the room. We met with Eduardo and Delia in their showroom in Astoria, Queens to share with them our ideal vision for what we wanted and needed from the space.
Within days of our meeting, we were sent our first living area design. We loved seeing the beautiful rendering of the room! Eduardo and Delia had carefully considered the intentions we desired for the space and how to cohesively connect the living zones.
After reviewing the design, we provided feedback on what we liked and didn’t like about the images and they updated the design for us. We went through 2 revisions before we landed on a design that we felt was PERFECT for the room!
Design 1
What we Like: The removal of the second sofa makes the room feel more like one large space. The credenza opposite the side window is a perfect location for extra storage. The addition of lounge chairs is a great way to comfortably sit, while being oriented towards the windows.
Ideas for Revision: The room feels so much larger in this design! We’d love to have it set up to include a lounge area with a game table, in addition to the couch area.
Design 2
The second option incorporated our feedback and showed how a lounge area could fit into the space.
What we Like: We love the addition of the lounge area to the design! This area provides so much flexibility, as it could be used as a seating area, game/puzzle area, or even for meals. The orientation of the dining table is perfect, as it still comfortably seats 6, but takes up less room in the overall layout. We also like the contrast between the circle and rectangle rug, and that there is not a rug under the dining table (crumb catcher!)
Idea for Revision: We love this design, but realized the placement of the couch will not work in that location due to the baseboard heaters directly under the window. The furniture needs to be 12 inches away from the heater, which would create an awkward gap and make it difficult to pull out the sleeper sofa. We’d love to switch the location of the lounge area with the living room area!
Design 3
What we Like: We love that there are now 3 zoned areas in the room, simply by shifting the orientation of the dining table. The location of the lounge area with a table in the middle of the room will allow for overflow dining space directly next to the dining table, if there are more than 6 people. The 4 lounge chairs will allow people to comfortably sit and enjoy the views out of the large windows. The couch area feels so much more open! The girls have space to play on the large floor rug, while still remaining in view if we are sitting in the lounge or dining area. We love this design!
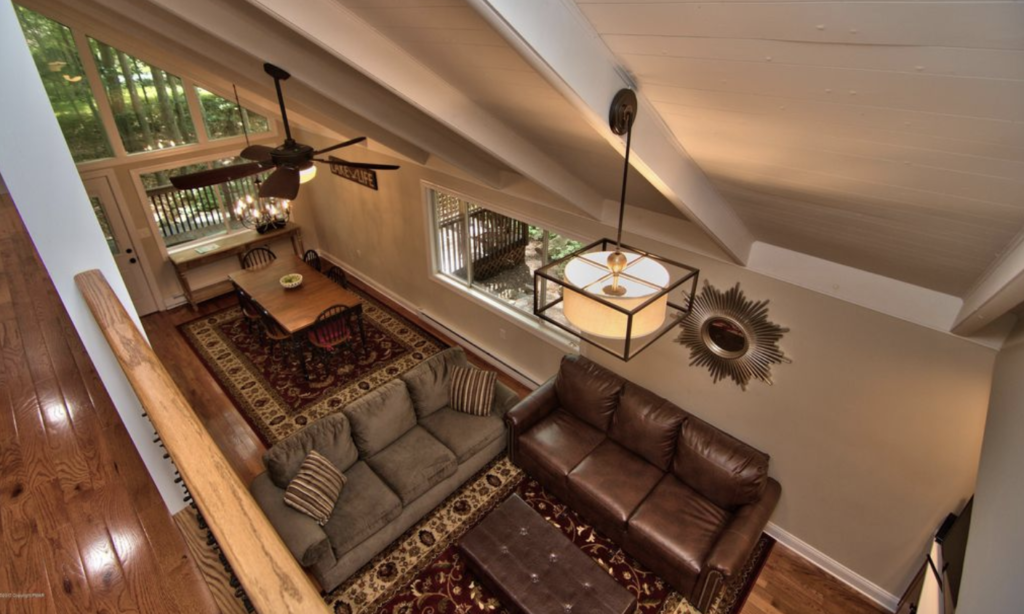
Final Design
We are so happy with our 3rd living area design from INCASA. They also sent us this elevated image of the final layout.
Now that we have finalized the living area design, it is time to get to work! We have started making mood boards and ordering furniture. We are excited to see our vision start coming to life!
Thanks for pinning!
_____________________________________________________________________
This post contains affiliate links. We may make a small commission for purchases made through these links with no additional fee to the customer. We only link to products we use and love! Thank you for supporting our blog!
UPDATE: Check out MORE from Woodland Cottage:
December 20, 2019
Living Area Design
Hi, I'm Tidy Dad!
Tyler Moore is the creator of the “Tidy Dad” Instagram, TikTok, and website. A public school teacher in New York City, husband, and father of three young daughters, he has been featured on Good Morning America and in The Washington Post, The New York Times, New York Post, Better Homes & Gardens Secrets of Getting Organized magazine, Apartment Therapy, and many podcasts including HGTV and Minimalist Moms. During the school year, he lives with his wife, Emily, a pediatric occupational therapist, and three daughters in Queens, New York. In the summer, they spend as much time as possible in their small but tidy cottage in the Poconos.

")
welcome to the tribe!
i'll be sending you an e-mail soon!
so be on the lookout in your inbox!


