
Homemade Ornaments
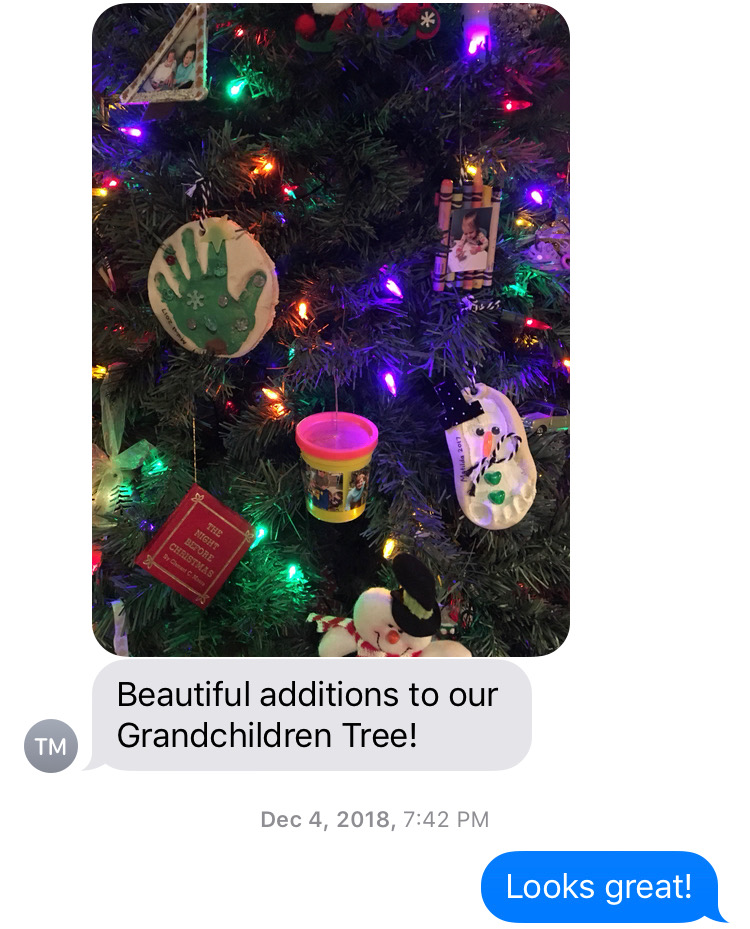
Yesterday we used our new Portal by Facebook device to video chat with my mom in Kentucky! The girls were excited to see their Nana’s holiday decorations. Nana took the girls on a tour of her Christmas tree and reminded them of all of the homemade ornaments they’ve made for her (and all the other grandparents!) over the years.
Every year since Mabel was a baby, we’ve made homemade ornaments to send to grandparents. We use simple craft supplies and try to think of a meaningful way to commemorate each year! Our homemade ornaments designs are different each year, and it is fun to try out new techniques.
Salt Dough Ornaments
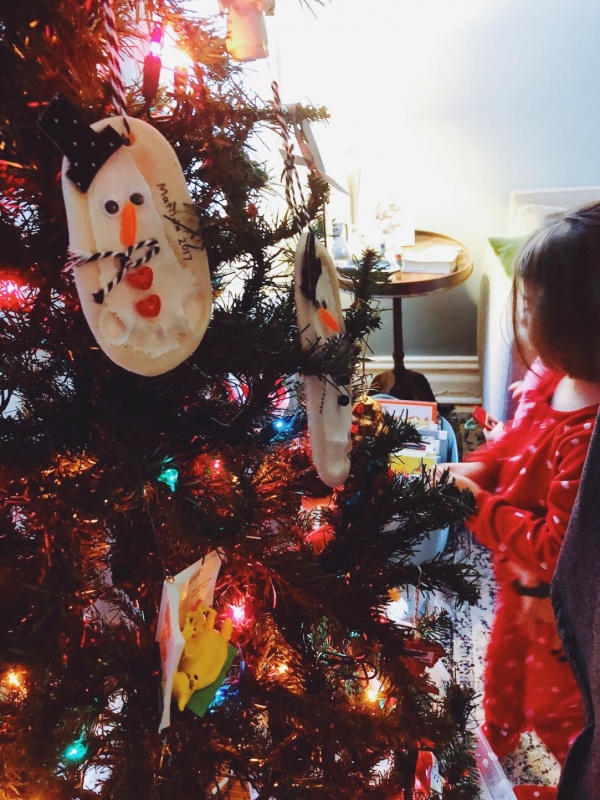
Baby handprints and footprints are absolutely precious! Homemade salt dough is super easy to make and uses ingredients that you probably already have around the house. Simply make the dough, imprint your design, and then embellish with paint and accessories.
Salt Dough Recipe
Ingredients
- 2 cups of plain flour
- 1 cup of salt
- Up to 1 cup of water (add water slowly, as you may need less)
Directions
- Whisk the flour and salt together until ingredients are evenly distributed
- Slowly add water to the dry ingredients until a dough forms (if dough is crumbly or dry, just add a little more water)
- Knead the dough for about 5 minutes
- Roll the dough and form into a shape (you can also use cookie cutters!)
- Using a sharp object, create a hole in the top of the ornament (this will allow you to have a place to add string to hang ornament on the tree, after it comes out of the oven)
- Bake for 2-3 hours at 200 degrees in the oven
Play Inspired Ornaments
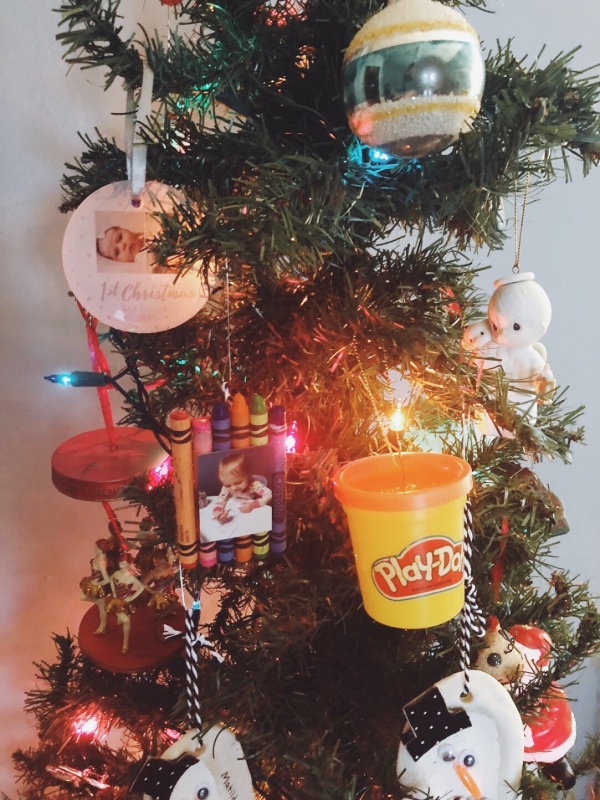
It can be fun to repurpose play items into creative craft ornaments that represent your child’s interests! One year Mabel was OBSESSED with Play-Doh and Matilda was beginning to learn how to color with crayons. We repurposed those play objects and created beautiful ornaments that commemorated their favorite type of play from the past year!
Play-Doh Ornament
Materials
- Empty 3 oz Play-Doh container
- String
- Push pin
- Printed photograph
- Mod Podge
Directions
- Clean out Play-Doh container
- Puncture Play-Doh lid with push pin
- Thread a string through the top of the lid and knot the string
- Place photo on back of Play-Doh container and brush photo with Mod Podge
- Allow Play-Doh container to dry
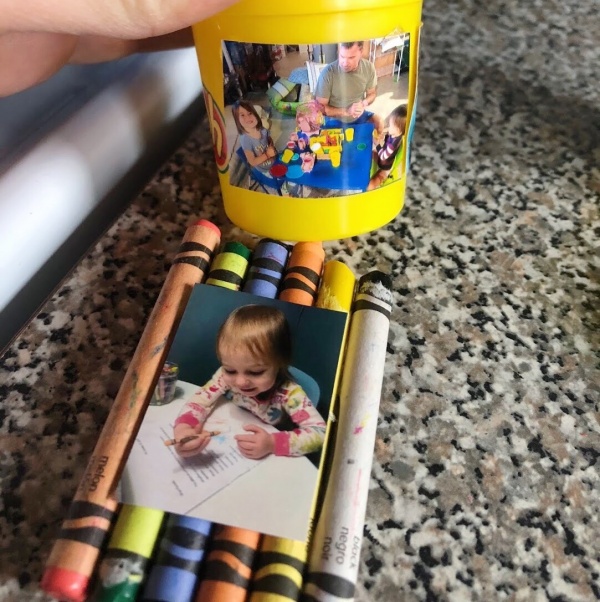
Crayons Ornament
Materials
- Crayons
- Craft sticks
- Glue gun
- Printed photograph
- Mod Podge
- String
Directions
- Arrange 6 crayons on a flat surface
- Measure width of crayons using a craft stick and cut craft stick to appropriate length
- Use hot glue to attach a craft stick strip at the top and bottom of row of crayons (on the back)
- Hot glue string to back of top craft stick (this will allow you to hang ornament on the tree)
- Place photo on front of crayons and brush photo with Mod Podge
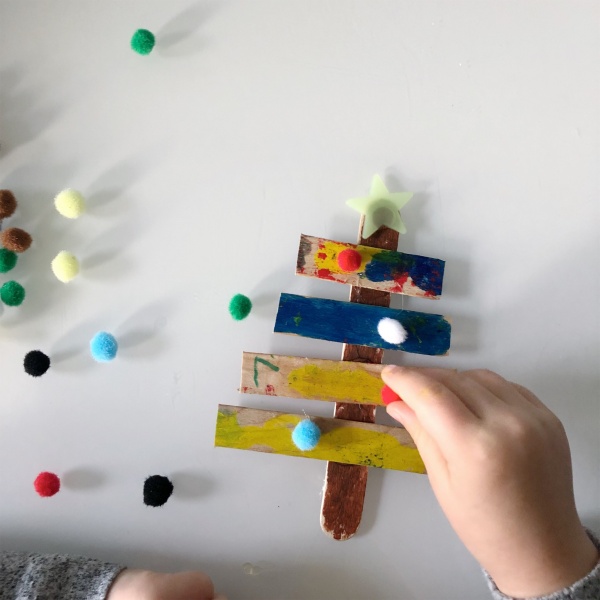
Kwik Stix Ornament Trees

We love painting without a mess using Kwik Stix solid tempera paint sticks! This year we used them to decorate craft stick trees! We made trees out of craft sticks, and then the girls each selected the decorations for their trees. When opening our craft drawer, Mabel immediately pulled out the googly eyes, while Matilda opted for a more classic tree look. Their little trees perfectly capture their personalities!
Tree Ornaments
Materials
- Kwik Stix paint sticks
- Craft sticks
- Glue gun
- String
- Assorted craft supplies (pom poms, buttons, stars, googly eyes)
Directions
- Decorate craft sticks with Kwik Stix paint sticks. Allow to dry for 60 seconds! (YES!!! The paint actually does dry that quickly!!)
- Cut craft sticks into various sizes and arrange in the formation of a tree.
- Hot glue another craft stick to the back of the formation, as the trunk of the tree
- Attach craft supplies to the tree using dots of hot glue
- Hot glue string to back of the tree (this will allow you to hang ornament on the tree)
_____________________________________________________________________
This post contains affiliate links. We may make a small commission for purchases made through these links with no additional fee to the customer. We only link to products we use and love! Thank you for supporting our blog!
Thanks for pinning!

Hi, I'm Tidy Dad!
Tyler Moore is the bestselling author of "Tidy Up Your Life" and creator of the
"Tidy Dad" Instagram, TikTok, and website. A NYC public school teacher, husband, and father of three, he’s been featured on The Today Show, Good Morning America, The Washington Post, The New York Times, HGTV, and more. Tyler lives with his wife, Emily and their daughters in Queens, NY, and spends summers at their tidy cottage in the Poconos.
December 13, 2019
Homemade Ornaments

Browse All
parenting & Daily Living

Browse All
Tidying & Organizing

Browse All
Meal Planning & Cooking
More about tidy dad

Browse All
recipes
join over 35,000 subscribers
Subscribe to the tidy times!

Browse All
NYC Adventures


Browse All
Tidy Toolkit Resources
Order Tidy Dad's bestselling book!
join over 35,000 subscribers
Tidy Dad's monthly newsletter
Homemade Ornaments
Yesterday we used our new Portal by Facebook device to video chat with my mom in Kentucky! The girls were excited to see their Nana’s holiday decorations. Nana took the girls on a tour of her Christmas tree and reminded them of all of the homemade ornaments they’ve made for her (and all the other grandparents!) over the years.
Every year since Mabel was a baby, we’ve made homemade ornaments to send to grandparents. We use simple craft supplies and try to think of a meaningful way to commemorate each year! Our homemade ornaments designs are different each year, and it is fun to try out new techniques.
Salt Dough Ornaments
Baby handprints and footprints are absolutely precious! Homemade salt dough is super easy to make and uses ingredients that you probably already have around the house. Simply make the dough, imprint your design, and then embellish with paint and accessories.
Salt Dough Recipe
Ingredients
- 2 cups of plain flour
- 1 cup of salt
- Up to 1 cup of water (add water slowly, as you may need less)
Directions
- Whisk the flour and salt together until ingredients are evenly distributed
- Slowly add water to the dry ingredients until a dough forms (if dough is crumbly or dry, just add a little more water)
- Knead the dough for about 5 minutes
- Roll the dough and form into a shape (you can also use cookie cutters!)
- Using a sharp object, create a hole in the top of the ornament (this will allow you to have a place to add string to hang ornament on the tree, after it comes out of the oven)
- Bake for 2-3 hours at 200 degrees in the oven
Play Inspired Ornaments
It can be fun to repurpose play items into creative craft ornaments that represent your child’s interests! One year Mabel was OBSESSED with Play-Doh and Matilda was beginning to learn how to color with crayons. We repurposed those play objects and created beautiful ornaments that commemorated their favorite type of play from the past year!
Play-Doh Ornament
Materials
- Empty 3 oz Play-Doh container
- String
- Push pin
- Printed photograph
- Mod Podge
Directions
- Clean out Play-Doh container
- Puncture Play-Doh lid with push pin
- Thread a string through the top of the lid and knot the string
- Place photo on back of Play-Doh container and brush photo with Mod Podge
- Allow Play-Doh container to dry
Crayons Ornament
Materials
- Crayons
- Craft sticks
- Glue gun
- Printed photograph
- Mod Podge
- String
Directions
- Arrange 6 crayons on a flat surface
- Measure width of crayons using a craft stick and cut craft stick to appropriate length
- Use hot glue to attach a craft stick strip at the top and bottom of row of crayons (on the back)
- Hot glue string to back of top craft stick (this will allow you to hang ornament on the tree)
- Place photo on front of crayons and brush photo with Mod Podge
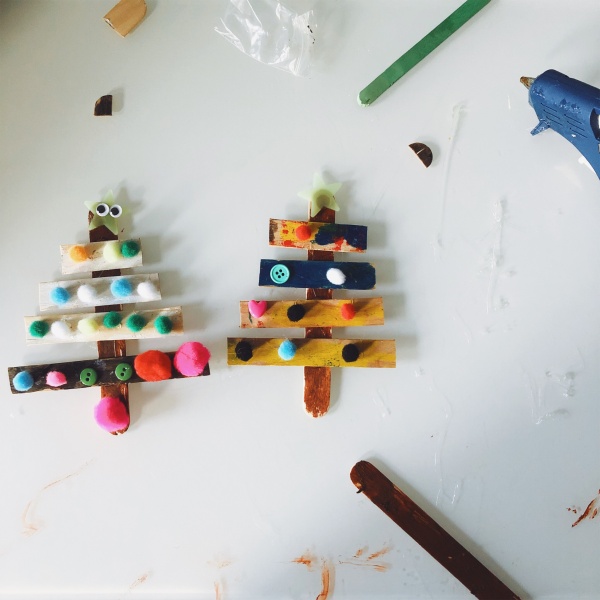
Kwik Stix Ornament Trees
We love painting without a mess using Kwik Stix solid tempera paint sticks! This year we used them to decorate craft stick trees! We made trees out of craft sticks, and then the girls each selected the decorations for their trees. When opening our craft drawer, Mabel immediately pulled out the googly eyes, while Matilda opted for a more classic tree look. Their little trees perfectly capture their personalities!
Tree Ornaments
Materials
- Kwik Stix paint sticks
- Craft sticks
- Glue gun
- String
- Assorted craft supplies (pom poms, buttons, stars, googly eyes)
Directions
- Decorate craft sticks with Kwik Stix paint sticks. Allow to dry for 60 seconds! (YES!!! The paint actually does dry that quickly!!)
- Cut craft sticks into various sizes and arrange in the formation of a tree.
- Hot glue another craft stick to the back of the formation, as the trunk of the tree
- Attach craft supplies to the tree using dots of hot glue
- Hot glue string to back of the tree (this will allow you to hang ornament on the tree)
_____________________________________________________________________
This post contains affiliate links. We may make a small commission for purchases made through these links with no additional fee to the customer. We only link to products we use and love! Thank you for supporting our blog!
Thanks for pinning!
December 13, 2019
Homemade Ornaments
Hi, I'm Tidy Dad!
Tyler Moore is the creator of the “Tidy Dad” Instagram, TikTok, and website. A public school teacher in New York City, husband, and father of three young daughters, he has been featured on Good Morning America and in The Washington Post, The New York Times, New York Post, Better Homes & Gardens Secrets of Getting Organized magazine, Apartment Therapy, and many podcasts including HGTV and Minimalist Moms. During the school year, he lives with his wife, Emily, a pediatric occupational therapist, and three daughters in Queens, New York. In the summer, they spend as much time as possible in their small but tidy cottage in the Poconos.

")
welcome to the tribe!
i'll be sending you an e-mail soon!
so be on the lookout in your inbox!


